For years now, I have been travelling with an Apple MacBook Air, a lightweight computer that acts as my photo backup hub. In the article I wrote a few years back, called Photo Download Backup Strategy, I describe how I use Adobe Lightroom to download and backup my digital camera images. This has been a foolproof way of working with images, but for many years, I have wondered if I could use an iPad for this instead, an even lighter and more compact option than the MacBook Air. Even when I travelled with my laptop, I also had an iPad along as well, for more convenient reading, web browsing… something I could easily take into a restaurant for example, to plan out the next part of my journey. However, my old iPad Air 2 just seemed too underpowered and interfacing it with external drives… well I never bothered to even try. I knew I could plug in a card reader to download images, but I tested it and it was slow, and not being able to easily backup my images onto a second drive from the iPad, well it didn’t seem safe to me. Easily copying files to and from external drives has only become possible in the more recent versions of iPad OS anyway. My attitude is that all storage media has the possibility of failing and I insist on multiple redundancy. See this posting of mine: Backups and When to Trust Hard Drives…
Recently, I decided to finally upgrade my almost 9 year old device and bought a loaded iPad Mini (6th gen). My old iPad had a big bezel and amazingly enough, despite the new iPad Mini being way smaller than my old iPad Air 2, its screen is not really all that much smaller since its screen nearly goes to the edge of its enclosure. I absolutely love the super compact form factor of the Mini, something I can tuck into even my smallest camera bag and take with me. It supports the Apple Pencil 2, which magnetically attaches to its side for convenient charging, and it’s great for working with photos, and for taking notes at work. Having a USB-C port on the newest iPads opens up a whole world of attaching external devices like card readers, mobile hard-drives, SSDs and USB sticks, just to name a few. I have a short USB-C to USB-A adapter cable, which allows me to plug in any standard USB device. So far, everything has worked flawlessly; even mobile “spinning-platter” hard drives that draw power from the iPad itself work just fine. I am actually a bit surprised with how well everything has worked. To download images from my X-PRo2, I use a fantastic, compact SD memory card reader that plugs right into the adapter cable, the Sony MRW-S1. The headline image for this blog posting shows the card reader connected and Lightroom’s import window. The main limitation to the iPad Mini is that the largest storage available is 256GB. This is fine for shorter trips, but I may run into issues on longer trips where I might do a lot more shooting, or if I were to upgrade my camera to a new 40MP model! For serious use as a laptop replacement, an iPad Pro would likely be a better choice.
So… for the first time on a recent week-long trip to Victoria, I decided to leave my laptop at home and just use the iPad Mini with Lightroom Mobile to download each day of shooting every evening. I then backed up the day’s images to a SanDisk 256GB USB stick that I carry in my camera bag at all times, as well as to a SanDisk 500GB SSD that I hide away between the clothes in my luggage. Generally speaking, apart from a few quirks, it actually worked quite well indeed, frankly better than I had anticipated. I did the same on an even more recent week-long camping trip to central Oregon. Let me walk you through the process in more detail…
In Lightroom on the iPad, I first create a parent folder for the trip, for example “Oregon 2023”. Then, in that folder, I create a new album each day that I download into. For example, “Day 1”, “Day 2” and so on. I then import into that folder as in the following screenshot…

When you look at the images on a card prior to importing, Lightroom groups the images by day, which is convenient. I usually format my cards after each day of shooting, once I am sure things are redundantly backed up, but once in a while I forget, then start shooting to the partially filled card the next day. With Lightroom Mobile, I can just click the check-box for the date I want to import and it will ignore the previous images. Note that the import window does not render the raw files, but once imported, Lightroom handles the raws just fine. Once you’ve imported the images, in Lightroom you can choose to filter images and just show the raw files, which is what I do when I am working with them.
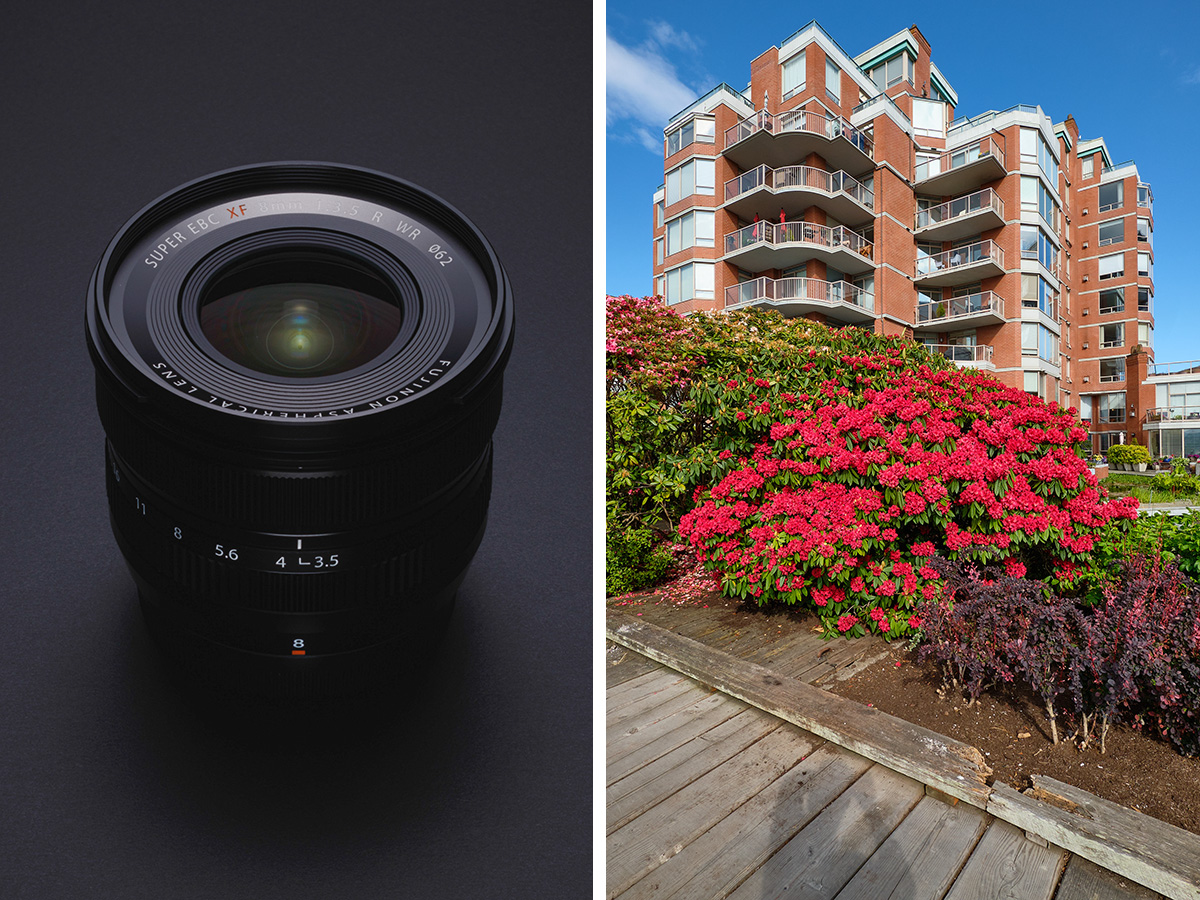
As far as download speeds, I was shocked at how quickly it worked. The iPad Mini downloaded images far faster than my 2012 MacBook Air with its built-in card reader using Lightroom Classic. As far as rendering speeds for raw files, I was equally shocked as well. Even though the iPad Mini only has an A15 Bionic mobile processor, the same as my iPhone 13, it easily renders the X-Pro2’s raw files as fast as my old MacBook Air, probably even faster. When I was in Victoria, I had borrowed a Fujifilm GFX 100S to test the GF 20-35mm zoom (lens review coming in the future), and the iPad Mini handled those 100 megapixel raw files without breaking a sweat too! Sure, there was some delay when zooming in to see detail, but it didn’t seem as slow as doing the same on the MacBook Air. Obviously my laptop is very old, in computer terms, and any modern M1 or M2 equipped laptop will run rings around the iPad Mini (and around my old laptop), but still… the fact that I can work with 100MP raw images in Lightroom on that tiny iPad with a mobile processor… well it just blew my mind. A new iPad Pro with an M1 processor, and much more RAM than the iPad Mini, would be even more impressive! Equally impressive was the iPad’s battery life. Downloading a day of shooting, then backing up to two external drives, seemed to barely take any battery power compared to doing the same on my laptop, despite the fact that the iPad Mini has such a physically small battery.
So now the trick: how to get images from Lightroom and back them up to an external drive. This is the most critical step for me, so I can have redundant backups. First off, if you want both raw and jpeg files backed up, you need to make sure you don’t have any filters in place. In the following screenshot (you can click the screenshots for a closer look), you can see raw and jpeg image pairs showing in the Day 1 album, which I will use in this example…

To highlight everything, just tap on the “three horizontal dots” icon near the top-right of the screen and from there, you choose “Select Photos”. Once you do that, you can either tap on individual photos to select or deselect them, or just tap the “Day 1” checkbox and then all images in the Day 1 album get highlighted, as shown in the screenshot below…

Next, you would click on the “Share” icon at the bottom of the screen and choose the “Export as…” option. From there, make sure to choose the “Original” file type option as shown below, to make sure you are getting the images as they were downloaded from the card originally. Note that unlike the other options, choosing “Original” doesn’t offer any other parameters, like image size, compression, watermark, sharpening etc…

Then hit the checkmark button to accept and you’ll get a little “Share Photos…” window with a progress bar that rapidly counts through all the shots you’ve selected, in the example above only taking a few seconds for those 242 shots. When that is done, you are presented with a standard iOS Share window. The option to select here is the “Save to Files” one, which you can see below…

The Files app is iOS’s standard file manager program. From there, you can choose where to save the files. In this case, you can see below that I have chosen an external SSD, called LR DL-Backup, where I would choose to save into the folder I created with nearly the same name…

Below you can see the SSD drive plugged into the iPad with its short USB-C cable…

Once you have chosen the correct folder, you just click the “Save” button and the iPad will copy the files to the external drive. Being the paranoid type that I am (at least when it comes to trusting backups), after the copy is done, I open the iPad’s Files app, then navigate to the folder I copied to, in order to make sure the number of images it contains is what I expect after my last copy.
The copying operation actually seems a little slower than importing in the first place, but it still feels fairly fast to copy a bunch of gigabytes over to the external drive. I haven’t done any timed speed tests yet, but maybe during import, the Sony card reader works particularly swiftly in conjunction with the Sony UHS-II/V90 card that I shoot to, or maybe the iPad’s USB-C port is quicker importing than transferring out to an external drive? There are some significant speed differences between the USB-C ports that Apple uses on their range of iPads too, with some (like on the latest base model iPad) not being any quicker than the old Lightning port standard, and some (like on the latest iPad Pro models) achieving desktop computer levels of USB-C throughput. The iPad Mini falls somewhere in between speed-wise. So after I do the copy backup once with the SSD, and a second time with the USB stick, I then have images on three devices (the iPad, the SSD and a USB stick), so I am comfortable with formatting the cards at that point to reuse them for the next day.
All in all, this worked far more seamlessly than expected, save for a few quirks with Lightroom Mobile; I’m just going to say “LRM” from now on, to save on typing. So, LRM seems to default to wanting to upload/sync all your imported images to Adobe’s cloud storage, and for the standard Lightroom / Photoshop photographer’s bundle that I subscribe to, that amounts to a paltry 40GB. I don’t even want to use this cloud storage but there doesn’t seem to be any way to permanently disable cloud sync in LRM. You have to click on the cloud icon for the album you are in, the choose to pause syncing. Despite doing that, it seemed to me that syncing turned on by itself again, and every time you create a new album, you also have to pause it there as well. Quirky. While this was fine during my Victoria trip where I had regular WiFi in our hotel, during our camping trip to Oregon, the lack of Internet seemed to confuse LRM. At one point, all the images in one of my daily albums decided to disappear – it was empty! Thank goodness for backups!
I ended up importing all the missing images from that day back into LRM from my backup SSD. Interestingly enough, all the ratings and edits I had made to the images in that folder were still there, so I didn’t lose any work. I strongly suspect this had something to do with cloud sync being interrupted since I had briefly tethered my iPad to my iPhone to access a website with a larger screen, and although I had the “Use cellular for sync” option disabled in LRM, tethering to my phone via WiFi might have seemed like non-cellular WiFi connection and perhaps LRM tried to sync, only to be rudely interrupted when I disconnected again, so maybe it thought since there were no cloud images, there shouldn’t be any for that day on the iPad? I am not quite sure of the exact cause, but it was very disconcerting and again, highlighted the importance of having backups! Luckily, it had only happened that one time.
Another quirk is the perpetual “Loading…” message for each album, which you can see in the above screenshots. This is likely due to my pausing cloud sync. I really wish one could truly disable that! Lastly, without using cloud sync, it seems that the only way to transfer images with edits intact is to export them from the iPad as DNG files. There doesn’t seem to be an XMP sidecar file option when one exports original raw files like there is with the desktop version, which would allow all ratings and edits to transfer with the original raws. For various reasons, I am not a fan of converting to DNG and would prefer to keep my raw files as they came off the camera, but at the moment, that also means losing ratings and adjustments that I’ve made in LRM while on the road. Naturally Adobe would love it if I paid them more money and upgraded my cloud storage, but even that wouldn’t help when I’m off grid on a camping trip. In the end, once I returned from the trip I imported images from the backup SSD into Lightroom Classic on my desktop computer and basically started over with no ratings or adjustments, which is not an ideal situation. For now I’d say it’s tolerable, since there seemed to be many benefits overall when using the iPad instead of my laptop… its compact size (a benefit when downloading the day’s shots in a tent), great battery life and ease of charging (being able to get nearly four full charges from a compact 20,000 mAh USB power bank), speed of downloading etc.
Hopefully LRM will become more fully featured in the future, at least when it comes to catalog management and ease of syncing with Lightroom Classic, without using the cloud or DNG files. As mentioned, the simple option of exporting originals with sidecar XMP files would help my workflow tremendously. As far as image editing and adjustments, it is already plenty powerful. So… while I may take my laptop on longer trips still, I think I will try to continue to use the iPad as my primary means of download and backup. Fingers crossed the glitches get less as the software matures, or as I understand the quirks better and learn how to avoid them. So yes… one can now effectively use an iPad for downloading and backing up images while traveling… just be aware of some quirks and ALWAYS make sure you have images backed up elsewhere as well!
As always, if you have any questions about anything you read in my postings, feel free to drop me a line.