

We now have access to Loupedeck editing consoles at Beau Photo. These consoles are designed to allow for rapid and intuitive adjustments while using specific software, and have an array of buttons and knobs that you can use in lieu of clicking and dragging your mouse to different controls. While you can use these consoles for many different programs, the original use of the first Loupedeck was to control Adobe Lightroom. The initial Loupedeck, and the newer Loupedeck+, have a vast array of individual knobs and buttons, plus a large control dial, most of which are labeled with specific Adobe Lightroom editing controls. The main upgrades to the “+” model were buttons with a better tactile feel, a more robust main control dial, some slightly less specifically labeled buttons and some cosmetic differences in the case. By the way, any images below can be clicked to open them larger in a new window or tab…
 Loupedeck+ $359 (announced mid 2018)
So, rather than clicking and dragging the sliders for exposure, white balance or clarity adjustments for example, you can just twist some hard labeled knobs. While this was totally awesome if you were primarily working with Lightroom, when you tried using it with Photoshop or Capture One, which Loupedeck added support for, not all of the labels made perfect sense anymore. Enter the Loupedeck CT and Loupedeck Live…
In mid 2020, Loupedeck release the Loupedeck CT, a complete rethink of the original design that introduced dynamic button and dial labels instead of static printed ones. On its top half, the CT has six knobs that have OLED display labels next to them that can change based on which software you are using and how you have it customized. In addition, there are twelve touch buttons arranged in a 4×3 grid in the centre with OLED displays, and they can show text or icons that tell you exactly what they will do in whatever software you are using. The bottom half has a very large, prominent knob with a huge internal OLED display, and this knob, for example, could be very useful for scrubbing footage back and forth in a video editing program like Adobe Premiere. In the photo below, you can see that there are also a number of buttons on the lower half with somewhat generic labels, and many of those can also be defined to do various things in different programs…
 Loupedeck CT $699 (introduced mid 2020)
While the CT is a great unit, at $699 its price is perhaps a bit steep and might be hard to justify, especially if you are not sure how much it might help your workflow. Then in fall of 2020, the Loupedeck Live was released. It is basically the top half of the bigger Loupedeck CT, but at a much more affordable price-point, now selling for $339, which is even less than the original Loupedeck. Now we’re talking!
 Loupedeck Live $339 (introduced fall of 2020)
Ever since the first Loupedeck was announced, I was itching to get one for myself, but I always hesitated since the hard labeled buttons made me suspect that it wouldn’t be as conveniently flexible with other software, and I do use quite a variety of different programs when editing images; Capture One, Photoshop, Lightroom Classic, Photo Ninja etc. When the CT was announced, I was initially sure I was going to buy one… until I saw the price, which I simply couldn’t quite justify. Well the Loupedeck Live hit the pricing sweet spot for me, so I decided to dive in and get one a little while back. I can summarize the rest of this review in one word: COOL! However for more useful details, read on…
I have been using the Loupedeck Live extensively with Lightroom Classic and Capture One Pro, and it is fantastic. Adjusting images is so intuitive using the dynamically labeled knobs; heck, even being able to just twist a knob to straighten an image with a crooked horizon feels very natural. Loupedeck now has very powerful software to customize their consoles and I was able to reassign and reorganize the knobs in a way that made perfect sense for my workflow. Capture One support is still listed as being “beta” and while a few functions did not work as expected, with judicious use of Capture One’s “Keyboard Shortcuts” menu, as well as creating some custom button and knob functions in the Loupedeck software, I have been able to get things working near perfectly to my liking.
 Loupedeck Software Control Panel (here editing my custom Capture One Pro settings)
In Photoshop for example, I have various actions defined and can attach those to the programmable buttons. You can set up a number of things that a single button does in sequence, like saving and closing a file, then switching back to Lightroom. In the above screenshot of the software, you can see my custom Capture One Pro key commands at the upper left, and my custom rotation adjustments on the lower left of the screen. Loupedeck is continually adding support for a diverse array of software too. Here is a link that lists supported software (opens in a new window or tab)…
https://support.loupedeck.com/native-software-integrations
I must say, overall Lightroom support seems to be the best integrated of the programs I’ve tried it with, and operation is truly smooth and seamless. Capture One support still feels a bit clunky, especially since I needed to fix some of the functions that didn’t work at all, but I presume that will improve as time goes on. I did notice that using the Loupedeck Live with Capture One here at work with my Mac Mini, control tracking and display refresh lagged twisting of the physical knobs a little, but at home with my higher specced Mac Mini system (faster processor and double the RAM), the experience was much smoother. Note that Lightroom controls were immediate and responsive even with my slower work system. Anyone with a current computer that has a reasonably powerful video card, should find the overall editing experience very smooth indeed.
 Loupedeck Control Panel (editing knob functions for Lightroom Classic)
Above you can see the software in the knob control edit mode, and on the left you can see built-in Lightroom Classic control categories with the Details panel expanded to show what can all be assigned to a control… and pretty much every single Lightroom control is supported in fact! You can see that you can add multiple pages of knob functions to any set as well. As mentioned, for Capture One Pro I ended up making a number of changes to the default configuration. The following shots show my configuration and indeed, since taking those photos, I’ve reorganized things a bit more, mainly to make the position of some of the duplicated button functions appear in the same spot on the differing pages. It is very easy to go in and edit things, once you get used to the software, so tweaking on the fly is something I am still doing to this day…
 Page 1 Controls – Mike’s custom Capture One Pro Setup
I ended up extensively customizing the layout of the “beta” Capture One control pages and above, you can see the first set that appears when you push the round “1” button. It is a bit hard to tell, but when a page of controls is active, the corresponding round numeric button along the bottom edge is lit a touch brighter. There are two sets of dial controls that I defined for page one (see the 1/2 in the upper left corner), and you can switch between them by clicking down any of the knobs. You can also swipe down across multiple buttons to switch knob function pages as well, which is how you do it in the default Lightroom configuration.
Yes indeed, even the knobs click down and each can each have custom click function defined, although there is only room for one label, so by default I have the knob twist action labeled and not the knob click action. In Lightroom for example, clicking down any knob will reset the respective control to zero, which is a very nice feature that at the moment, cannot be done in Capture One… at least not that I can find. When a round button is lit green, it activates a page of controls. When it is purple, it has a custom keypress defined. For example, I have the 4 defined as the space-bar, and the 6 and 7 as left and right arrows to switch between images. When you click down on any dial in the above example, you get another set of dial functions (see the 2/2 in the upper left in the below image) but the custom buttons remain on the same “page”…
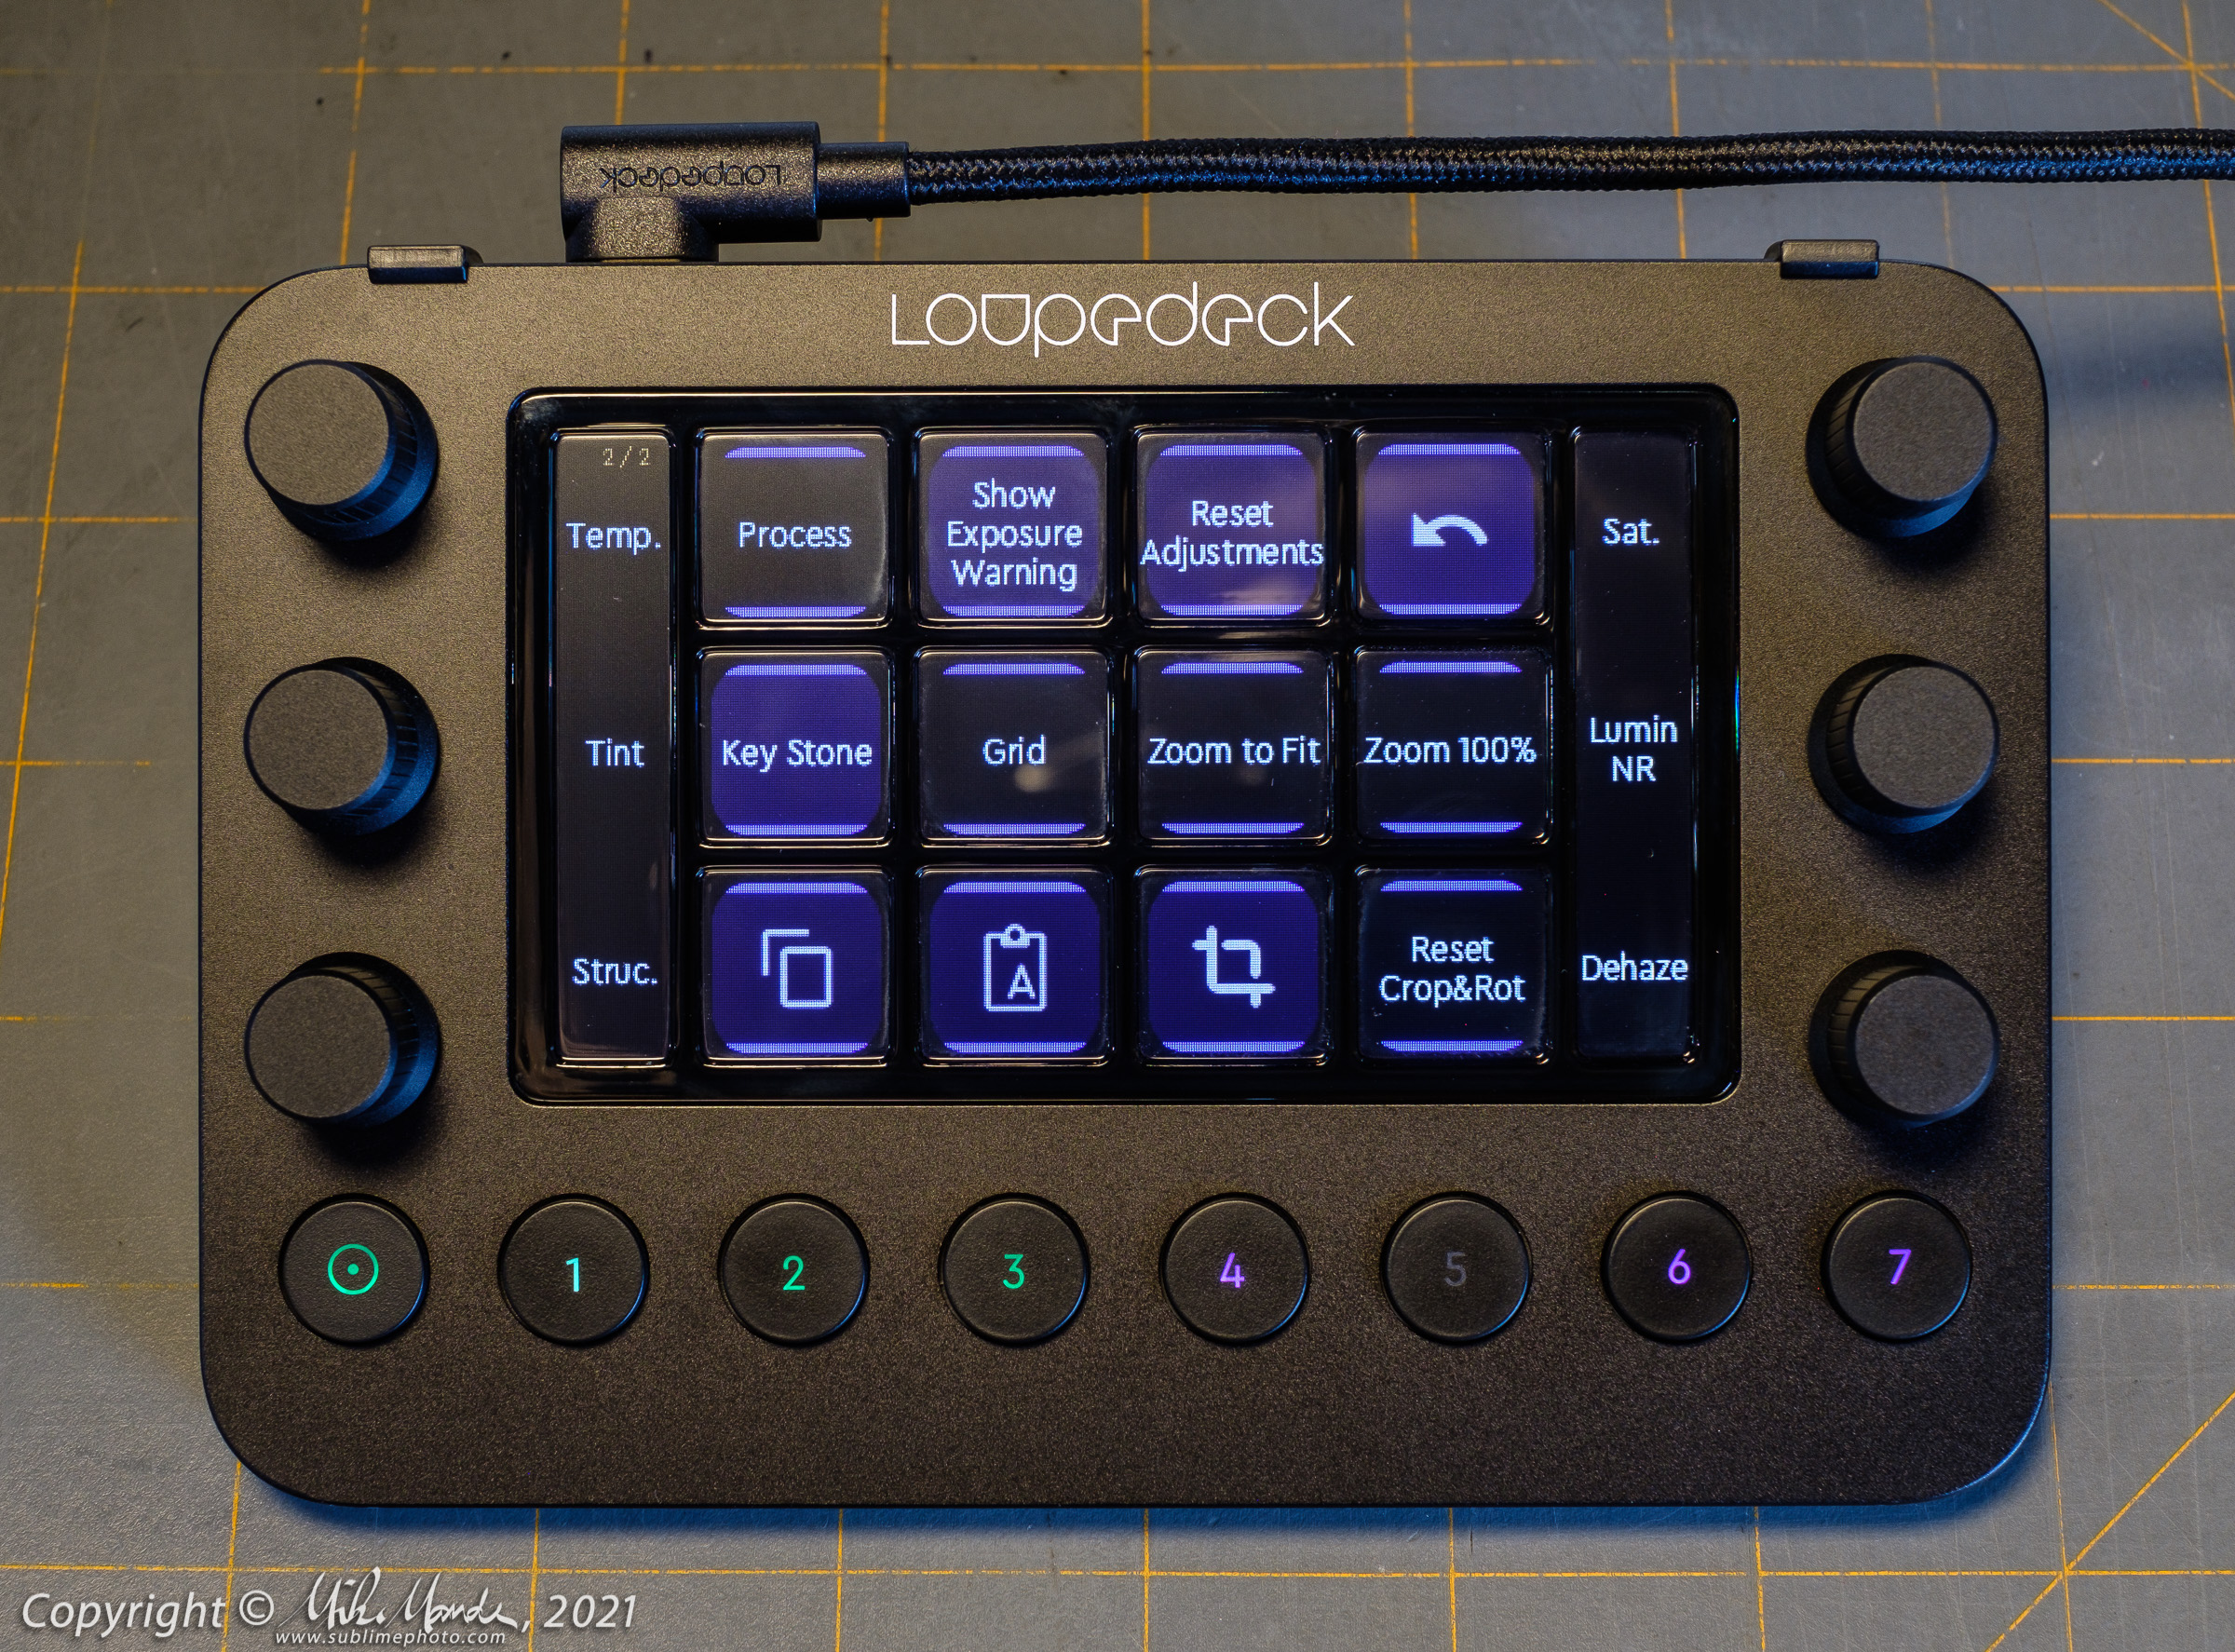 Page 1 with 2nd Dial Set – Mike’s custom Capture One Pro Setup
When you click the round 2 button, you get another page of buttons and control knob functions…
 Page 2 Controls – Mike’s custom Capture One Pro Setup
Above, we have my page 2 set. You can twist the lower two left side knobs for immediate horizontal and vertical keystone correction, and on the right, if I am working with the retouching brush or spot removal tool, I can quickly adjust the brush size. The bottom right knob allows me to directly dial in fine image rotation. One nice thing about having the dials, is being able to zoom in on an image to look at a small linear feature, like a telephone pole in the distance, and use that as a reference for adjusting levelling and perspective. It is a very intuitive way of working!
 Page 3 Controls – Mike’s custom Capture One Pro Setup
Finally, above is my third page of custom controls in Capture One Pro. Not much is different from Loupedeck’s default page 3, and here I only added a single star rating, deleted one button which I did not anticipate needing, and slightly rearranged the order of the buttons. I added a single star option since I assign that to images that either need further editing in a different program (for example, to apply my hot-pixel NR action in Photoshop), or ones that make up a selected series of images for a panorama stitch, so it was useful for me to add that in here.
As I think you can see, the configuration is hugely flexible and customizable. No, not everything can be done and much of the ability to customize relies on either how tightly Loupedeck’s software in integrated with your editing software (very tightly with Lightroom) or how many keyboard shortcuts there are in your editing software to allow for customized knob functions. This is where Capture One is superb, allowing you to assign keyboard shortcuts to a very large number of the adjustments sliders and tools, and that made customizing the Loupedeck Live fairly straightforward to meet my own workflow needs.
In addition, you can create custom graphical icons for button functions, but I have not bothered to do that yet. The text labels work just fine, but are not a pretty as coloured graphics would be of course! See the following Loupedeck marketing photo for an idea of how the button and knob icons can be customized…
 Loupedeck Live showing colour icons for button and knob labels
Lastly, as far as the hardware goes, the Loupedeck Live gives a very good impression. It feels extremely solid and well made, the physical buttons and knobs have great tactile feel and the plastic clip-on stand works very well too. With the stand, I find the angle perfect and it sits very solidly on the desk with good friction, staying in place during use. It comes with a high quality USB-C to C cable (plus a USB-A adapter), and one USB-C plug has a right angle connector. Since USB-C is reversible, the right angle allows you to have the cable running towards the right or left of the console. The touch buttons work reliably too and the only real criticism I would have for the Loupedeck Live is that the haptic feedback on touch button pushes feels a bit weird. When you activate a touch button, after a brief moment’s delay, you get an extended “buzz” from the internal vibration motor which feels more like something you’d get when a cellphone is ringing. I wish there was a shorter haptic “click” of some sort, rather than the extended buzz. You can adjust the haptics, but the different settings seem to go from a shorter buzz to a longer one, with no real change in the feel of the haptic feedback other than the length of the buzzing. I have mine set to the shortest setting, but I do wish I could go shorter yet.
However the above is really only a very minor complaint and in every other respect, the Loupedeck Live is a fantastic product. It makes editing photos an enjoyable tactile experience, similar to shooting them in the first place; for example, I love the tactile experience of shooting with my Fujifilm X-Pro2. Who knows, maybe it’s mainly the novelty of using a new “toy”, but I find that working on images with the Loupedeck is a lot of fun and seems to cut down on computer tedium. I’m glad I finally gave in and bought one!
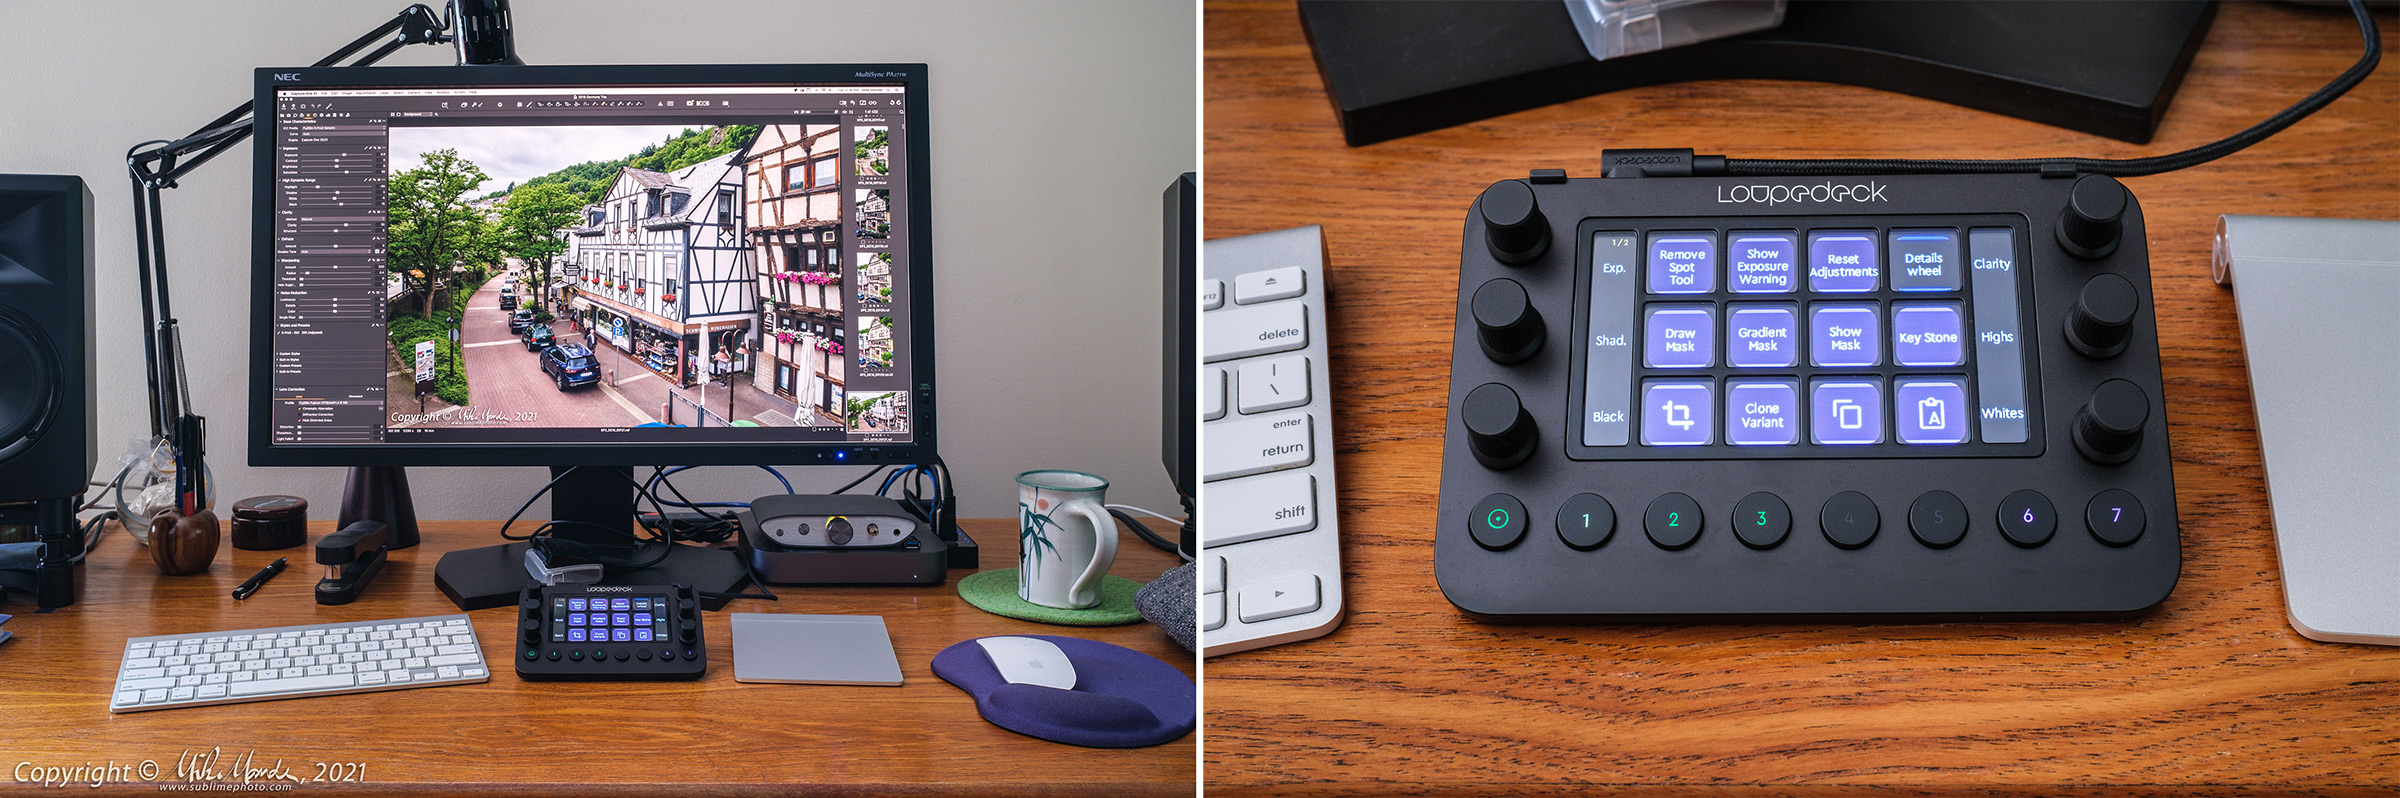
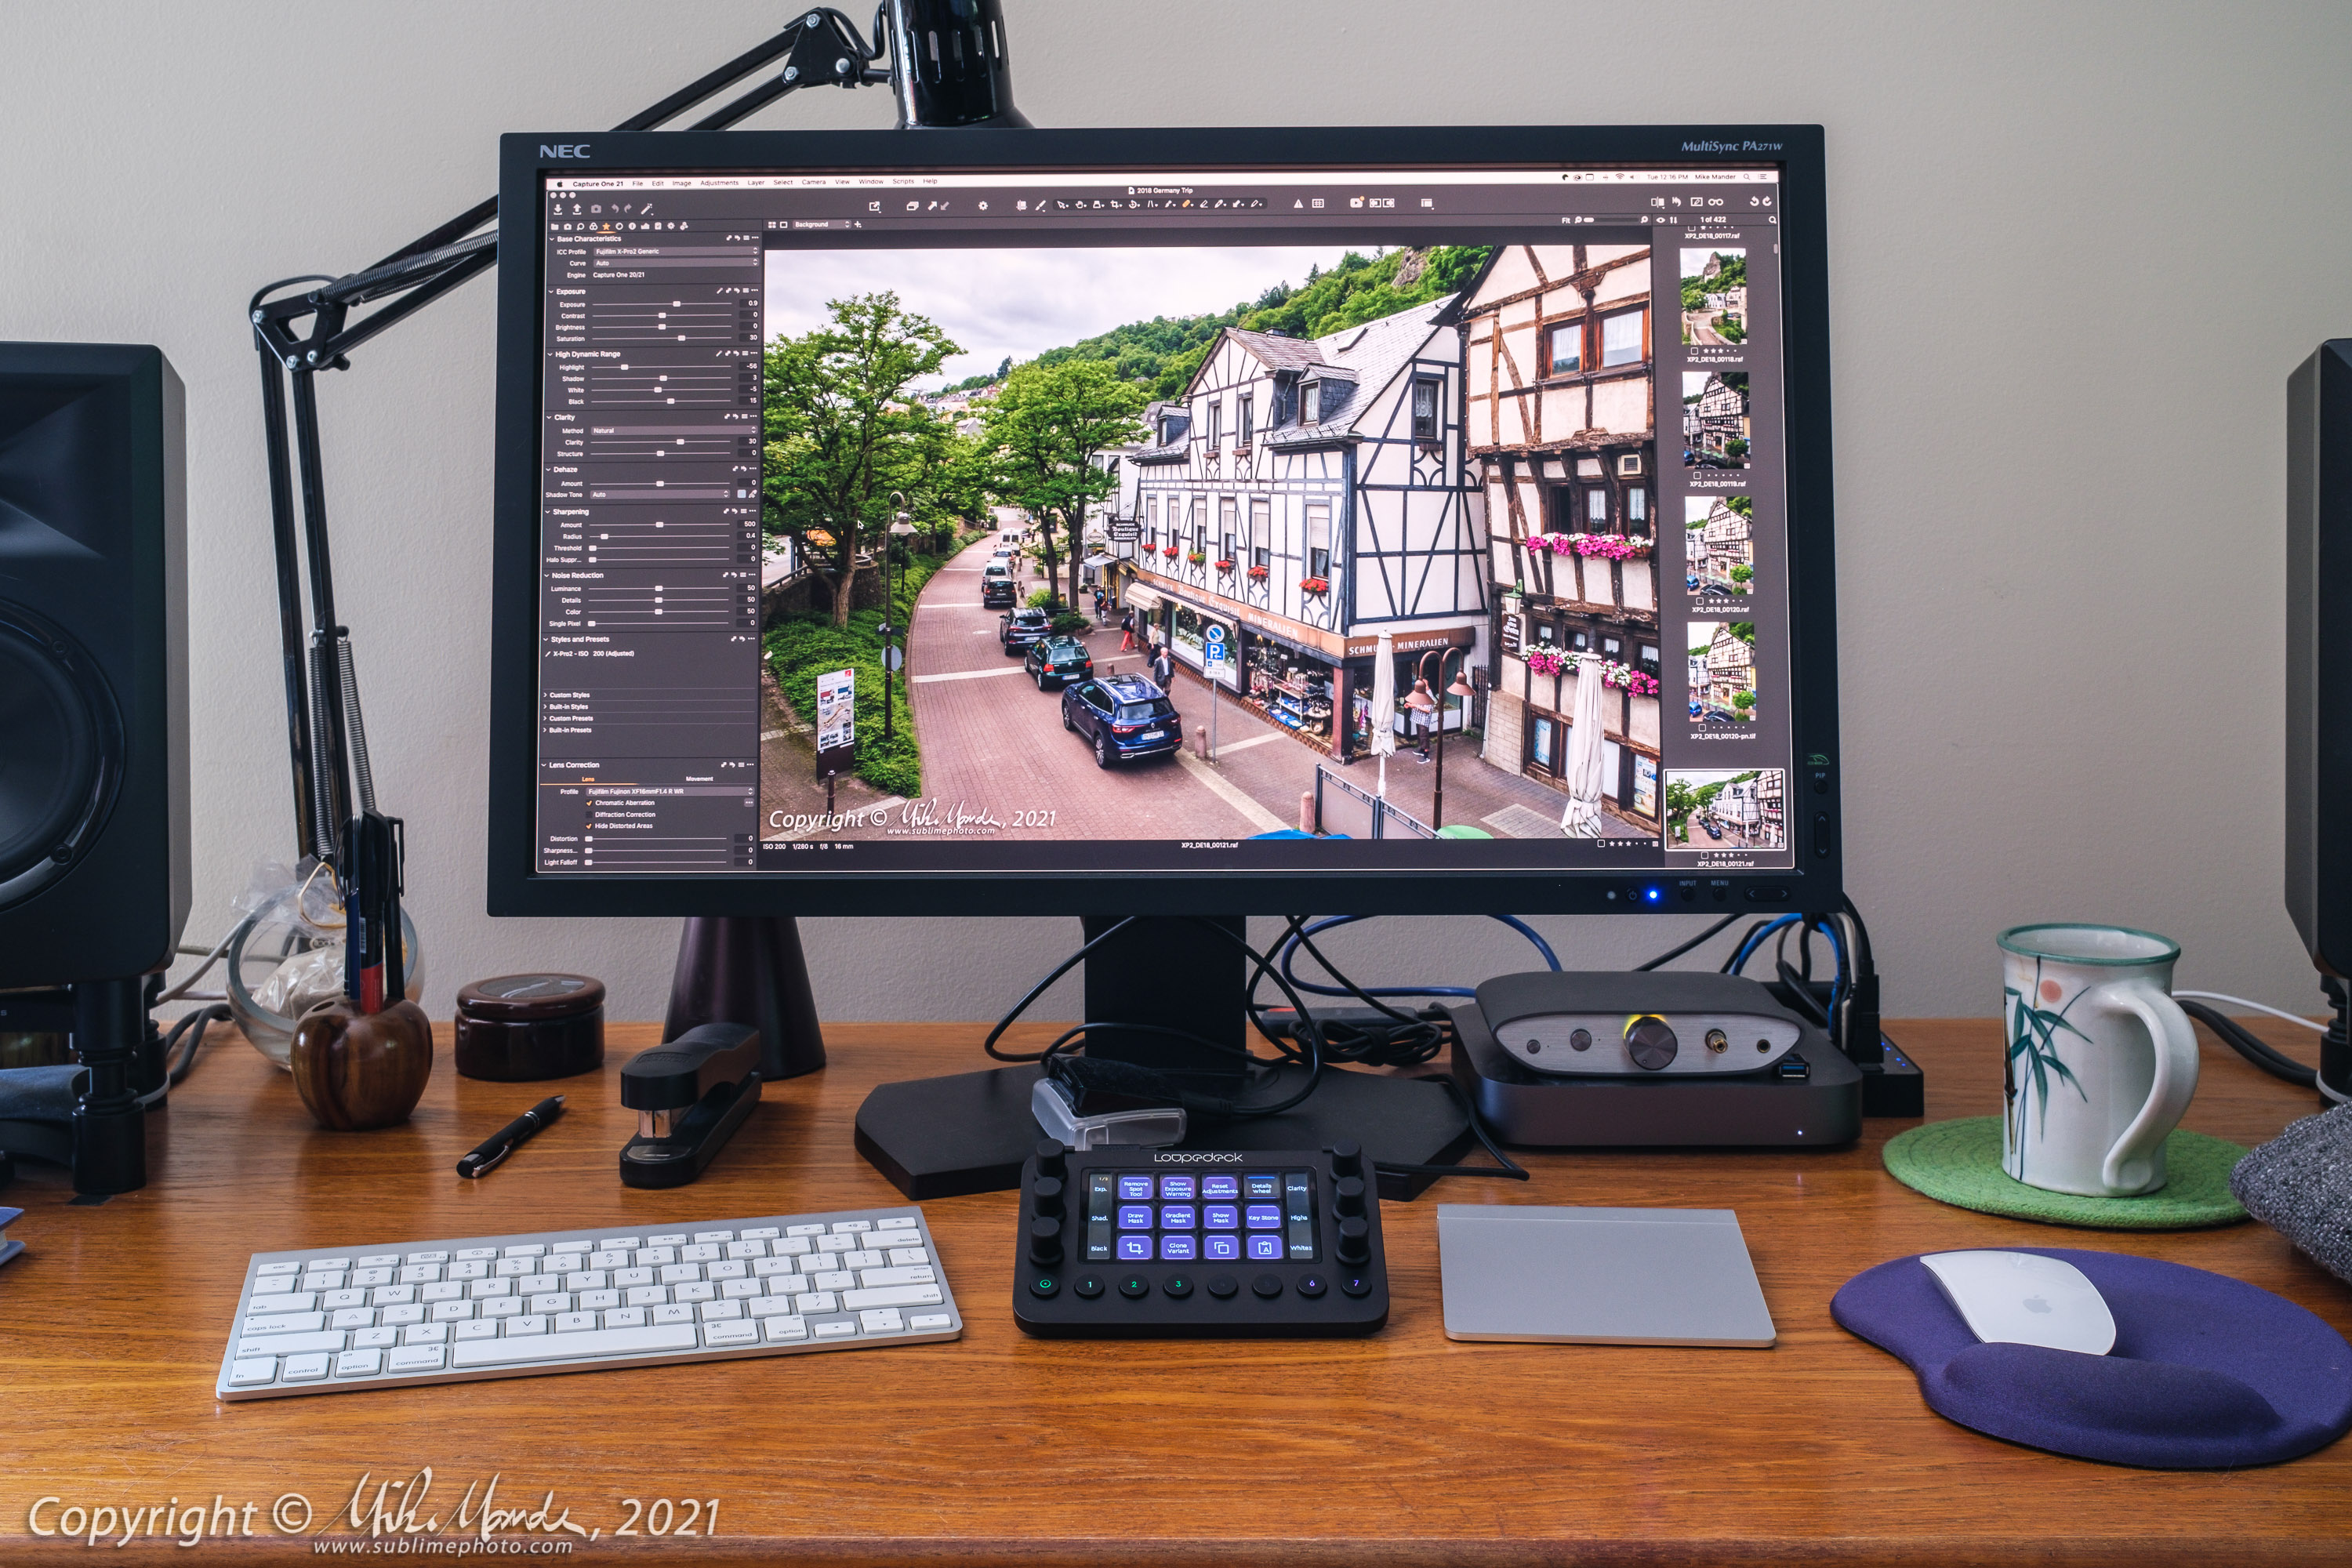 The Loupedeck Live in my home setup. It’s very compact!
For now, the Loupedeck products are special order items for us, but if the supplier has stock, it would only take a week or so to order one in for you. Here is a link that shows the Loupedeck editing consoles on our website: https://www.beauphoto.com/product-tag/loupedeck/
If you ever want to see a Loupedeck Live in action, please email me and let me know when you’ll be in. If you give me at least a day’s warning, I can bring mine from home for you to see. Cheers!
