

With the cost of film these days, it can be challenging to find the cash to get into large format photography. Not to mention the (perfectly normal and expected) mistakes you will make when first starting out with it. The mistakes are how you learn in this format, but the costs add up before too long. A great way to get into the world of large format without spending your savings is to use photographic paper instead of film. Paper negatives have been around since the beginning of photography in the form of the Calotype, discovered by William Henry Fox Talbot. The negatives were usually waxed to make them more transparent and reduce the paper texture before printing positives. Eventually, a method was found to coat silver gelatin emulsion on a transparent base, creating the film we know and love. Photographic paper is coated with a similar photographic emulsion, making it quite usable in camera to make negatives and today, we use this commercially produced darkroom paper to make paper negatives.
There are some things to know before jumping in to shoot on paper. First, the effective ISO is quite slow in comparison to film. Some say it’s between ISO 2 and 8, depending on the brand of paper. Probably no action shots then. Mind you, there aren’t a lot of people who shoot action on a large format camera so we’re probably ok here. Second is that paper negatives tend to be quite contrasty and have a low dynamic range, meaning there will be a good chance that either the highlights will be blown out or there won’t be good detail in the shadows. You may not be able to easily get both highlights and shadows where you want them without a struggle. As well, paper is not sensitive to red, which makes it great for working in darkrooms with red safelights, but in the camera, will render red, and other colours close to red on the spectrum as much darker than they actually are. If you know this, it can be used to your advantage. It can give skin tones an unusual look and red objects a dark, dramatic feel. It is also quite sensitive to blue, making blue skies bright white. All of this being said, the challenges can be worth it, rewarding you with unique, much less expensive large format images.
Shooting Photographic Paper in a 4×5 Camera

The scene photographed in full colour.

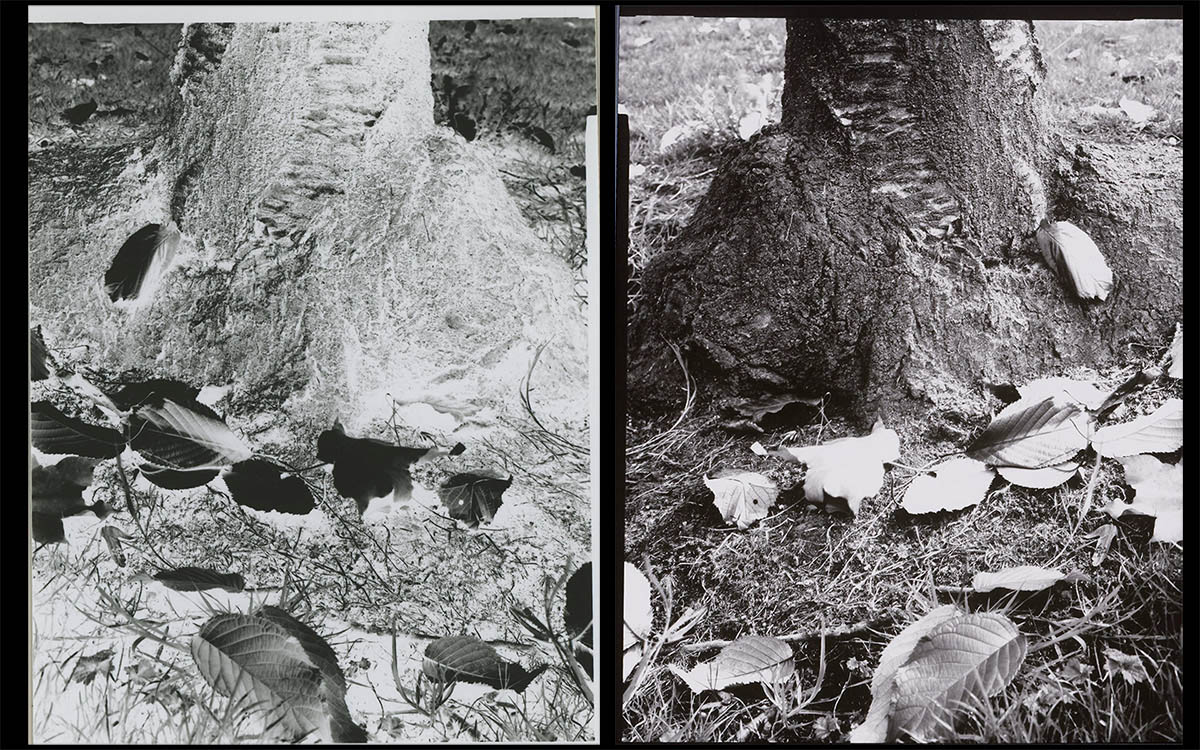
Positive image from a scan of the paper negative. The red leaves at the base of the tree are dark in the black and white image. The yellow leaves, and leaves that aren’t a true red are much brighter.
You will need a 4×5 camera and 4×5 sheet film holders to load your paper into. This also works with other formats using sheet film such as 5×7 and 8×10. Use any RC paper for your negatives. Fibre based paper (FB) will work, but it doesn’t lie very flat so is difficult to load. It’s also more expensive, and the goal was to make this cheaper! Get the Arista EDU Ultra RC 8×10 paper, cut it down to 4×5, and you will have 100 shots for $40! Note that 4×5 film is actually slightly smaller than 4×5 inches so you will have to do some trimming to make it fit. Don’t trim too much or it might fall out of the holder when you pull the darkslide.
You will probably have to do some testing to find the exposure that works for you based on the lighting situation and paper you are using. Setting a handheld meter to ISO 3, which is usually the lowest it will go, and taking a reading will give you a starting point. Set up the camera and make your exposure as you would if shooting film. You can make a test strip on one sheet by pulling up the darkslide in 1/3 increments and making an exposure each time, giving you three times on one sheet. This negative was exposed for 2, 4, and 6 seconds (bottom to top). The meter read 6 seconds at ISO 3 with an aperture of 22.5.
If you are just getting started with large format and aren’t sure what to do, we offer a workshop to help get you started. You can find this and other workshops here – https://www.beauphoto.com/workshops-at-beau/


Once you have made your exposures, you have a couple of options for developing the negatives. Because this is paper, use a paper developer like Flic Film Quintol Neutral Tone Paper Developer or Ilford Multigrade Paper Developer. The paper negatives can be processed in trays under red safelight, or alternatively, if you haven’t got easy access to a darkroom, use the Mod54, a 4×5 rack that fits into a three reel Paterson developing tank. Try diluting the developer 1:14 or 1:28 to control the contrast a little. Stop, fix and rinse as you would with RC paper in the darkroom and hang to dry.
You now have negative images on paper! You can scan these and make adjustment as needed. You can also contact print onto another piece of photo paper to get a positive, though this will increase the contrast with the copy. Because it is multigrade paper, you could use multigrade filters to control the contrast, though as with regular negatives, if it isn’t in the negative, it won’t be in the positive!
Using paper negatives is an inexpensive way to take photos with a large format camera, but cost isn’t the only consideration. They are quite interesting as an image and have their own aesthetic, and the positives created from them can be quite beautiful.

A range of different lighting conditions and exposures.
Try using paper in your large format camera next time you take it out!
Watch for the next blog post that will have more tips for getting the best paper negatives, and will feature some more experiments with using photographic paper in a camera.


