In my last blog post I talked about how to shoot paper negatives in your 4×5 camera. If you haven’t tried it, have a look and get some tips on starting with paper negatives. https://www.beauphoto.com/paper-negatives/
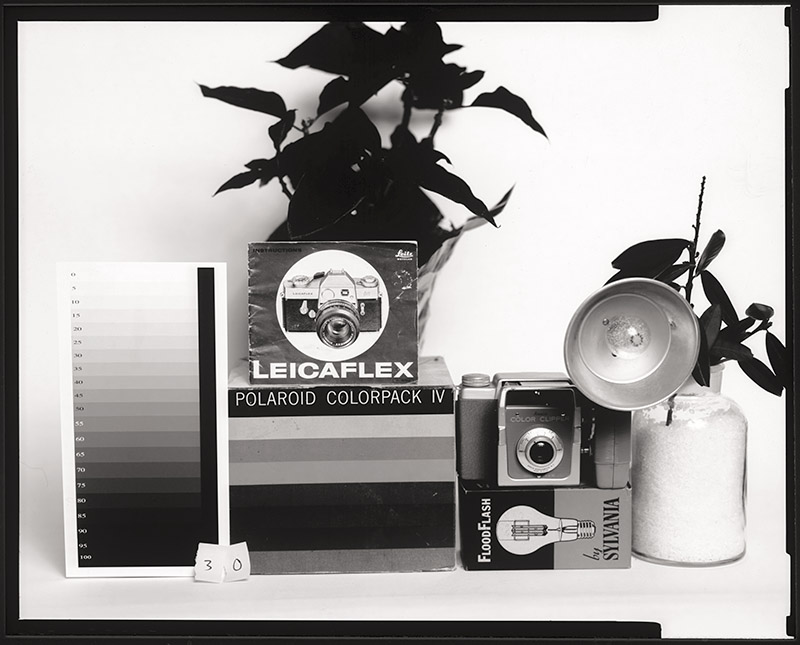
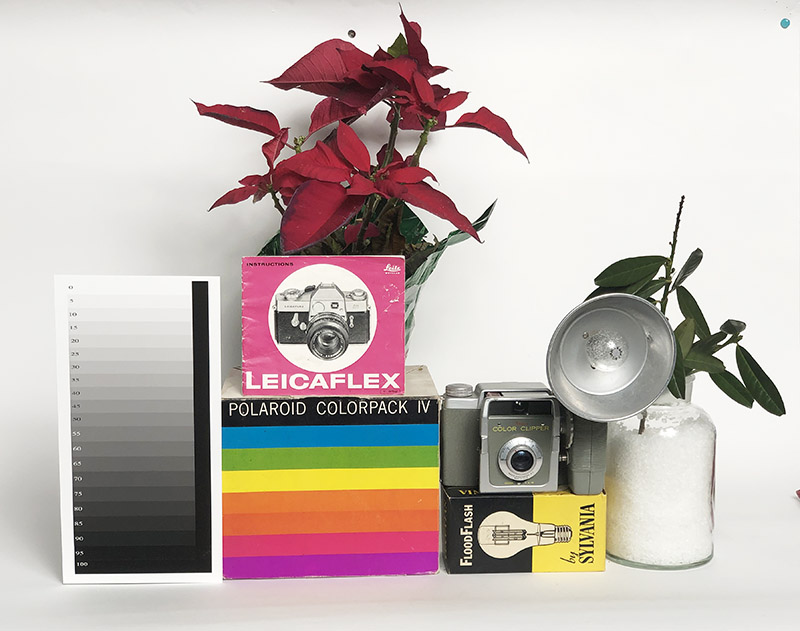
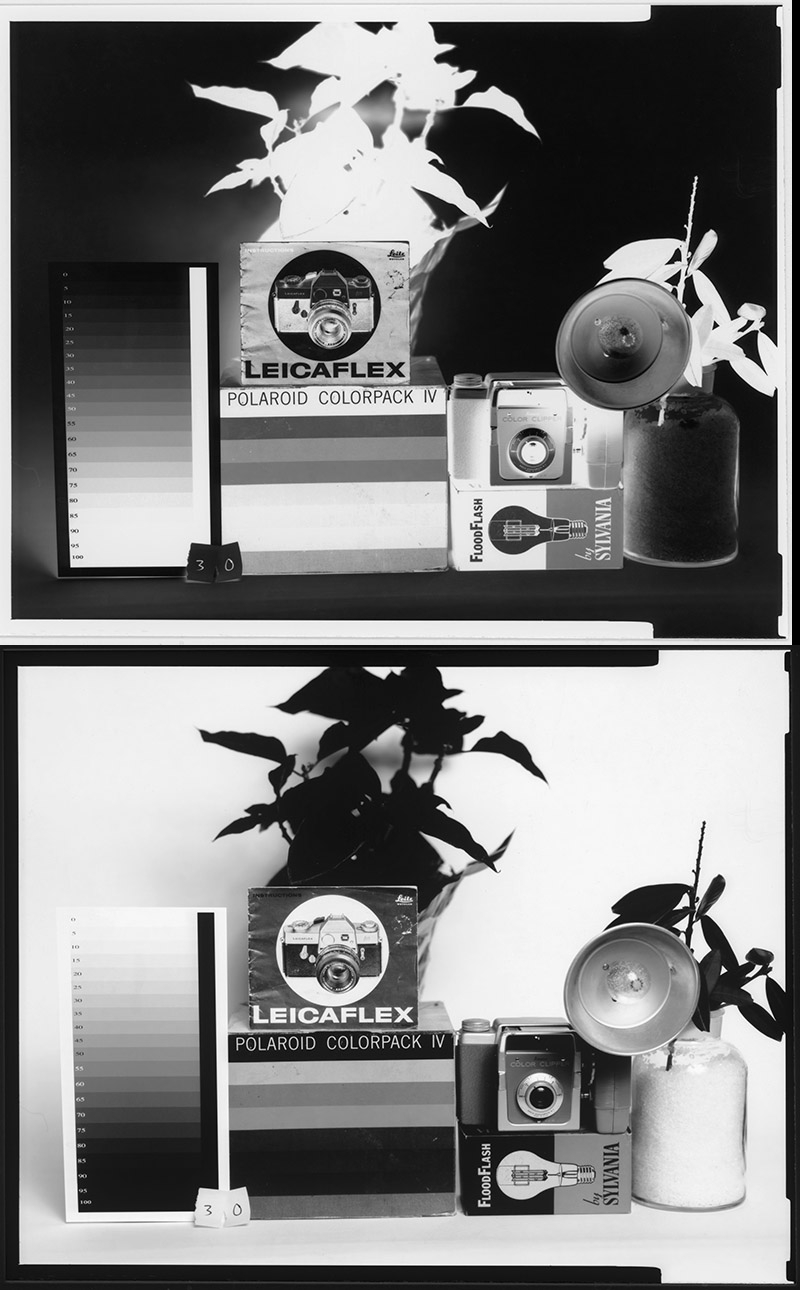
For this post, I am testing paper negatives with Ilford Multigrade filters to see how it affects the contrast of the image. I am using the Sinar 4×5 camera we have here in rentals, and the 210mm lens. I gathered an assortment of items from our shelves here, and included a step wedge that I printed on Hahnemuhle Photo Rag Matt Smooth paper on the Canon Pro 1000 printer (currently on sale!). I lit the scene with the Nanlite Forza 500B II Bi-colour Spotlight. We have one in rentals as well as for purchase.
The Ilford MG paper I used in the camera is formulated to give different contrast when used with Ilford Multigrade filters in the darkroom. The filters are not really optical quality and are on a polyester base, so there will be some loss of image quality, though I didn’t notice much in my tests. I held the filter right in front of the lens during exposure so it was at the same distance from the front element that a thread mount filter would be.
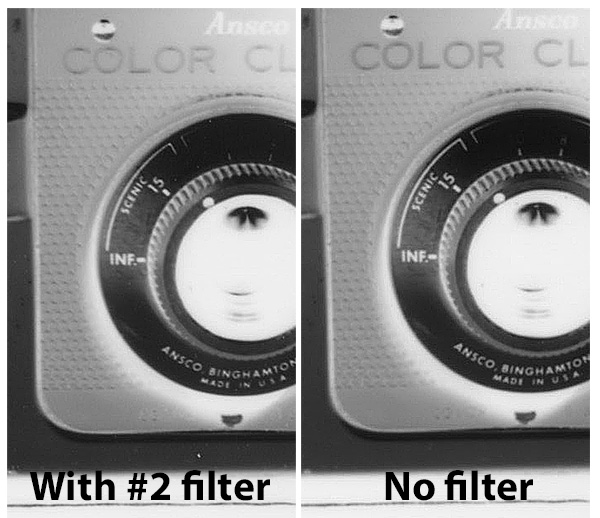
Generally, paper negatives have higher contrast than film negatives. This is ok if you are scanning them as you can adjust the contrast in Photoshop, though you may still lose some of the detail in the bright highlights and deep shadows if they don’t record in the negative to start with. By using the MG filters to control contrast I can produce a negative that has better details in the bright highlights and deep shadows. This is also easier to print in the darkroom if you want to produce analogue positives. I made one exposure with no filter to see how the contrast compares to using filters. I found that using the #2 filter had a similar contrast to not using a filter at all. This seems to confirm Ilford’s statement that using white light with no filter is about equivalent to a grade 2. https://www.ilfordphoto.com/wp/wp-content/uploads/2017/04/Making-your-first-print.pdf
I metered with an incident meter and arrived at an exposure of 1 second at f8, rating the ISO at 3, which is as low as the meter would allow. I also did a meter reading through the filter and it reduced the light by 1 stop. Since I didn’t want to have the lens wide open at f5.6, I opted to increase the exposure to 2 seconds at f8. I would have liked to stop the lens down a little more for more depth of field, but also wanted to use the timing of the shutter to make the exposure rather than my counting, which might not be as accurate. I fired the shutter twice at 1s for each exposure. Ilford recommends that you double the exposure when going from a 31/2 filter to a 4 filter and above, but I kept the same time throughout, and it doesn’t seem like the higher filters are underexposed a stop. I have also noticed when printing that it hasn’t needed a one stop increase when changing filters with most enlargers that I’ve used.
Below are the results as positive images of the single filter tests, starting with no filter and then going from 0 to 5, skipping the 1/2 filters, with 0 being the low contrast end and 5 the high contrast end. I have only inverted the negatives to positives and flipped them horizontally, with a small amount of sharpening as they were scanned on a flatbed scanner. The lower contrast filters definitely have more detail in the highlights, with density in the 5 step that is lost by the filter 2 image. As the filters go toward 5, the shadows also start to block up with the 65 step being the first one that isn’t totally black. You can also see the increase in contrast and density in the grey camera on top of the lightbulb box. By filter 2, the detail in the crystals (sodium thiosulphate) in the jar are also lost.
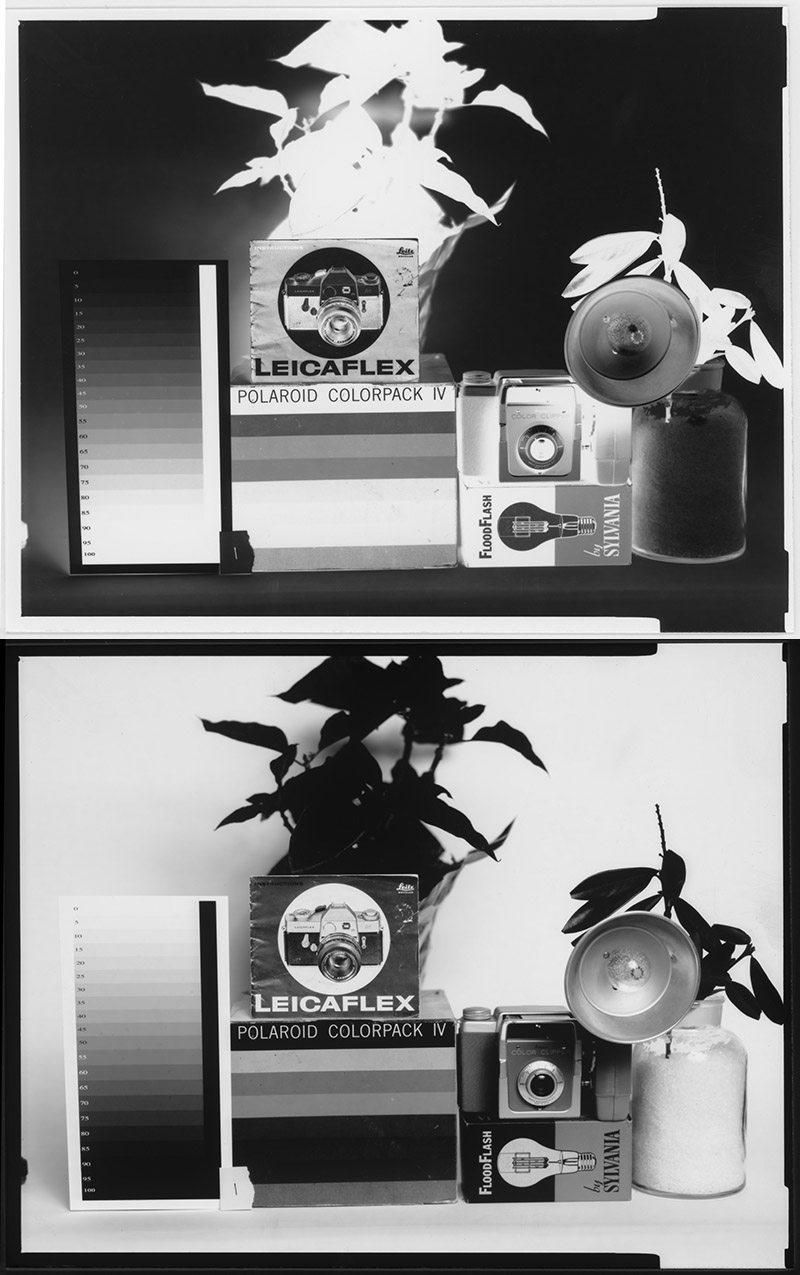
If I had to choose between the filters, I’d probably pick the 0 or 1 filter as I’d rather the negative be a bit flat to start, especially knowing that if I make an analogue print on paper from it, it will gain contrast. This can also be controlled with the same multigrade filters but better to have the details to start with. As you can see, you can’t really get the best of both good shadow and highlight detail, with the midtones not being too flat. As you can in the darkroom, I thought I’d try split grade photographing! This involves using two different filters in the same exposure to get details in both the shadows and highlights. The print shadow detail comes in with the lower contrast filters and the print bright highlights show more detail with the higher contrast filters. This is reverse from printing in the darkroom as we are making a negative to start rather than a positive I made one negative with a 1s exposure at filter 5 and 1s at filter 0. I made another with 1/2s at filter 3 and 1 1/2s at filter 0. The first negative ended up having too much contrast still, but by making most of the exposure with a low contrast filter, and then just adding a bit of density in the negative shadows, the highlights in the positive print were bright but still had detail. Below is a comparison between the single filter image with the #1 filter and the split grade image that worked quite well.
There was one other unexpected effect of using the multigrade filters to make paper negatives that had I though hard about, would have been obvious. They also act as colour filters because I am photographing a colour scene. This means that the actual colour of the filters will block or allow light from colours in the scene and change the contrast and density of objects. This is especially obvious in the Polaroid box with the coloured stripes, and in the yellow part of the lightbulb box that goes black in the positive image with filter 4 and 5. It seems a bit unpredictable as the paper is also not red sensitive, and the filter colours are varying amounts of magenta and yellow. I would say to test it to see the results.
One final observation I have about making paper negatives is that because they are paper, I tended to not treat them with quite as much care as I might a film negative. I think years of making test prints has made me regard small paper images as not as important. These are the actual negatives and should be handled with care. I did find that they collect dust quite easily and needed a good cleaning before scanning. It might also be because I just left them sitting out. Stored in proper Printfile negative sleeves would keep them safe and clean.
Using multigrade filters with paper negatives can add quite a bit of creative contrast control over the image. Paper negatives are a great, inexpensive way to start with large format, and can also be used in older cameras that have unusual formats. They are also an interesting final image in themselves. Do a lot of experimenting, and have fun with them!
