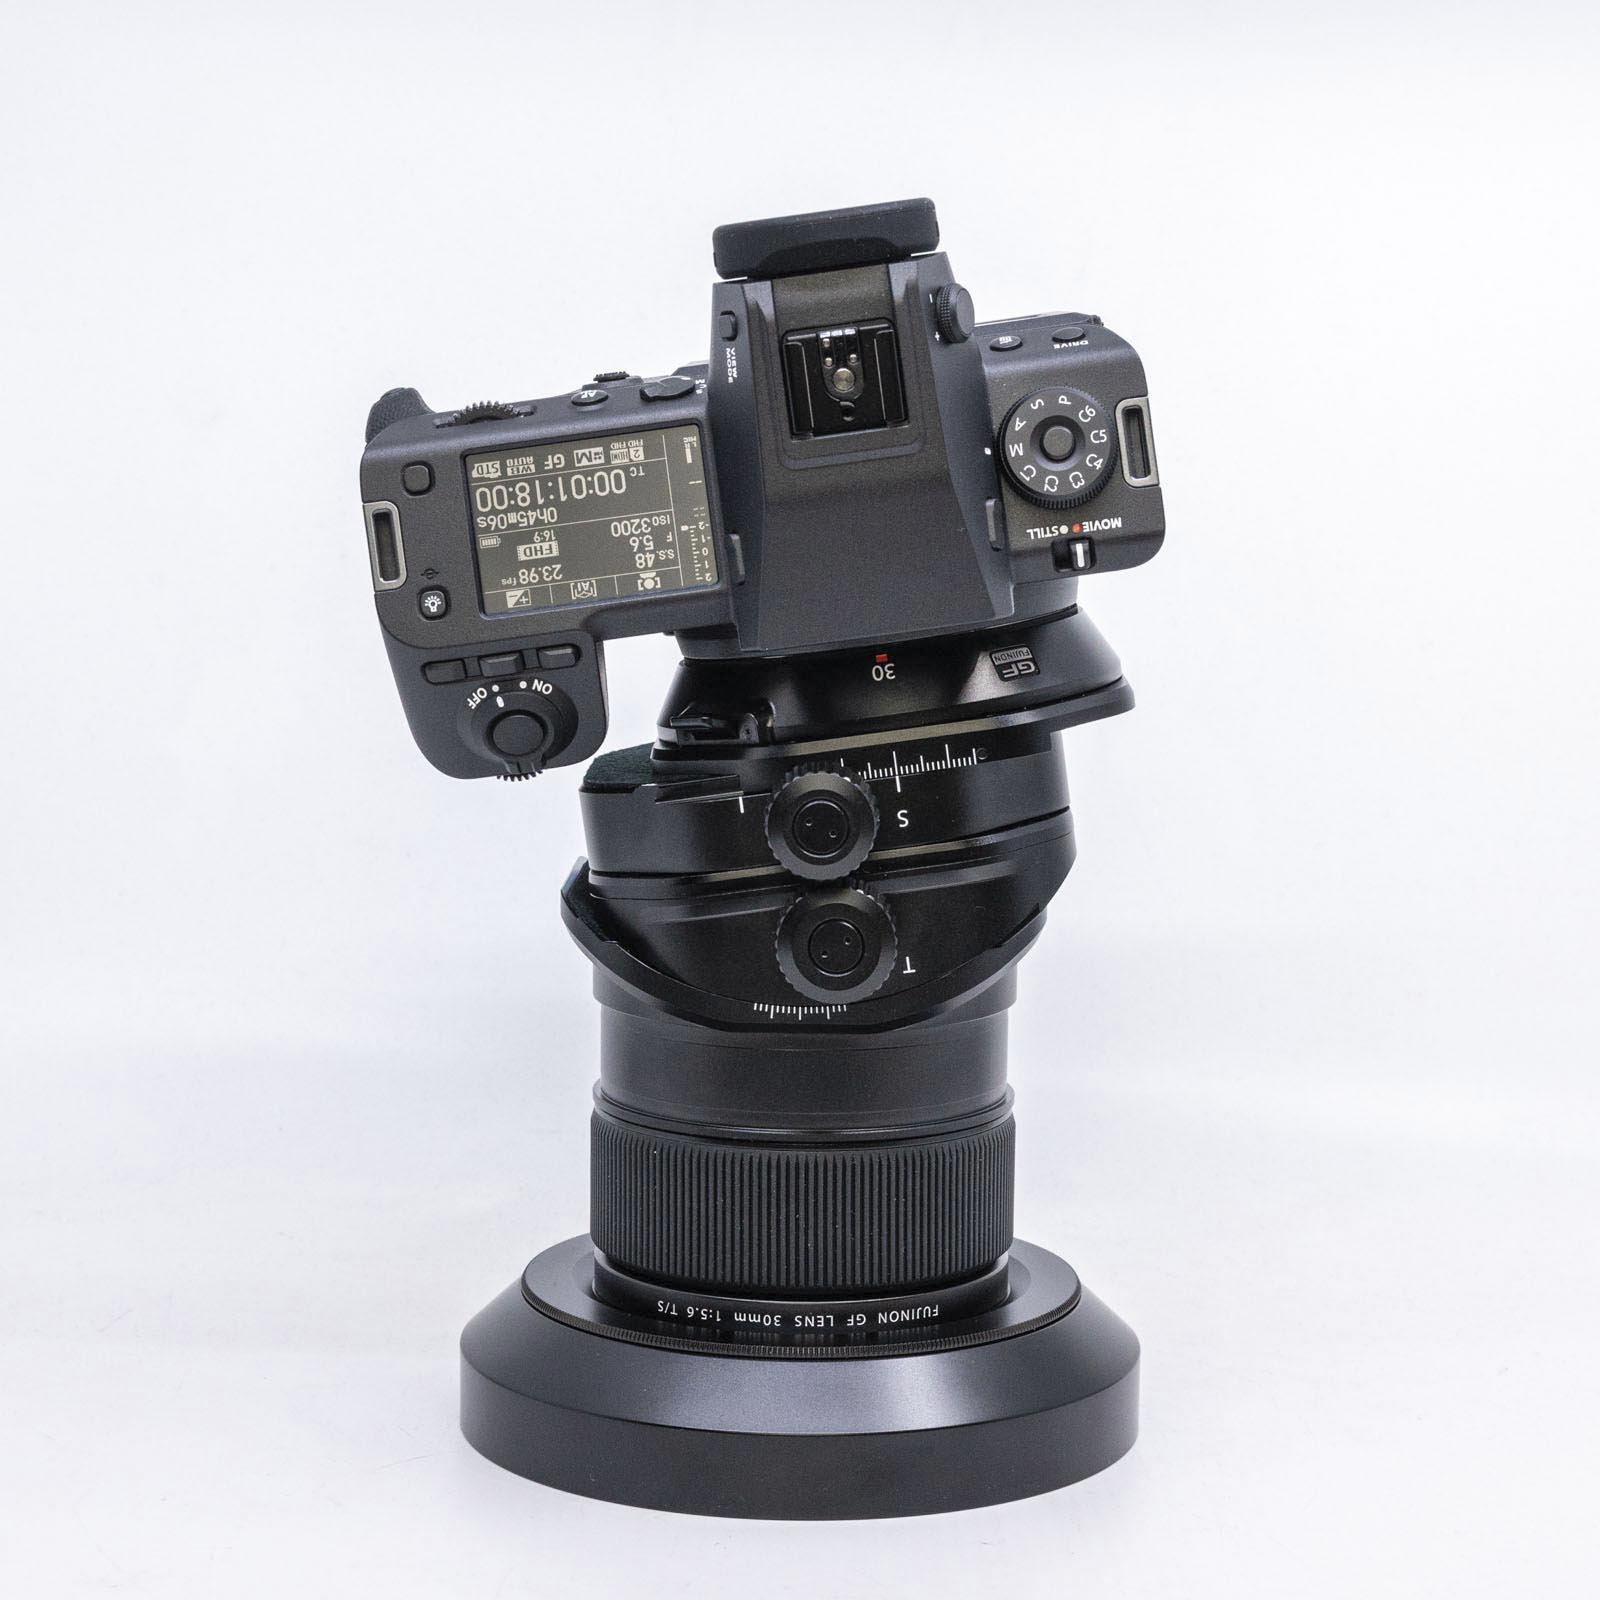
The long awaited Fujinon GF 30mm f/5.6 T/S tilt-shift lens has finally arrived, albeit in extremely limited quantities so far! In fact, we only received one lens that was specifically requested to be put into our rental pool. Unfortunately, we still have customers waiting for the 30mm T/S although we did finally receive stock on the new GF 110mm f/5.6 T/S Macro, which I have yet to test.
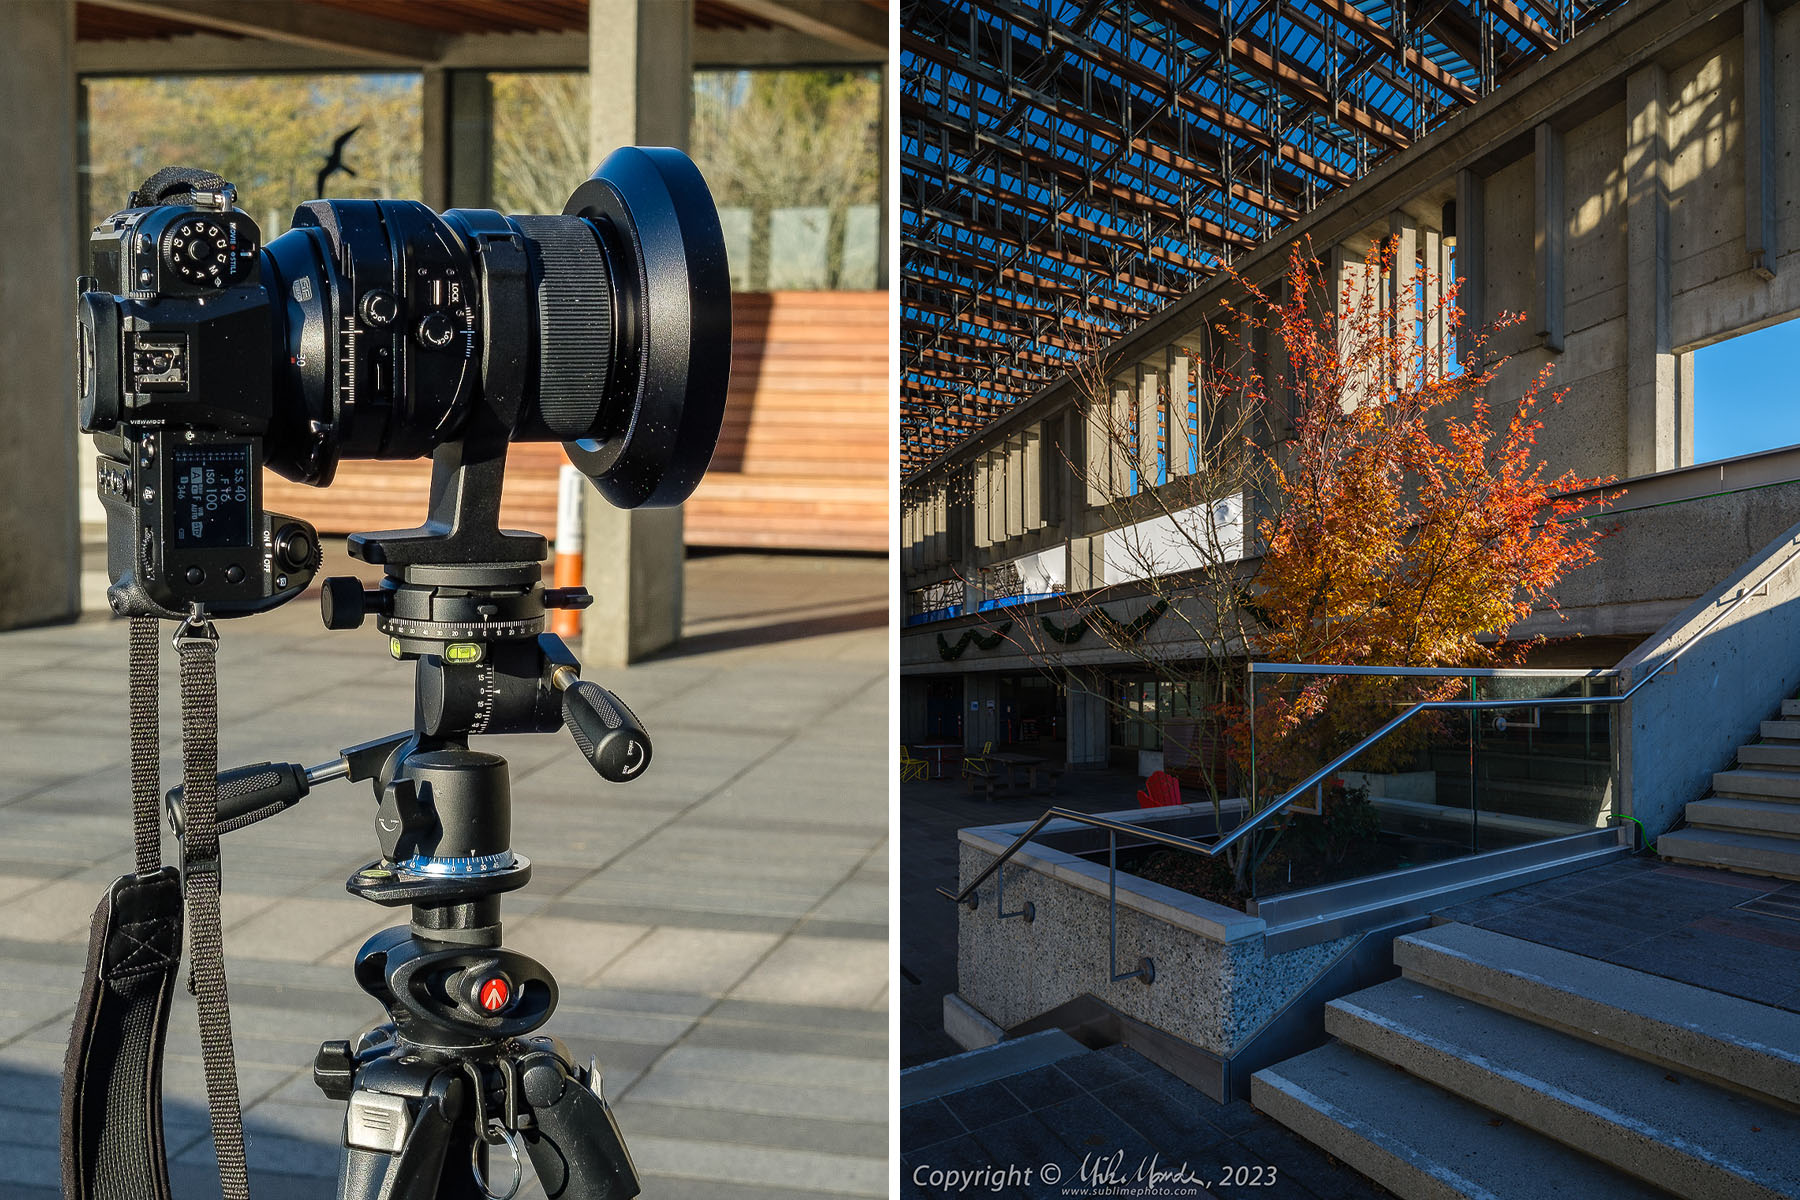
A few weekends ago, I had the brief opportunity to test out the new 30mm T/S on a GFX 100S up at Simon Fraser University, the Burnaby campus. There are lots of opportunities there to test tilt-shift lenses with great subject matter for shots. Following is a link to a gallery with 15 samples, and they can be downloaded at a fairly large 6000 pixel wide (on the long dimension) size. Please note that as of this writing, our EXIF data and download links are not working after an update to our back-end website software – we are working on a fix but sorry, that might be a few weeks away still. However, once you click on an image in the gallery, you’ll be able to right-click on the larger one that opens and either download it, or open it in a new window to allow you to see it at its full resolution. The downloaded images will have EXIF data intact.
Fujinon GF 30mm f/5.6 T/S Sample Images (15 images – opens in a new window or tab)
Ultimately, there isn’t all that much to say about this lens that is not expected. It is absolutely superb with sharp results at the edges on a 100MP sensor even when shifted a great deal. I actually don’t think I ever needed to shift it fully, but I was close on a few shots I believe. The tilt movement is generous, and all the requisite tilt-shift adjustments, detents and locks are there and operate smoothly and precisely. You can rotate the entire lens assembly on the mount to vary the orientation of the tilt and shift axes vertically or horizontally, as well as rotate the tilt axis and shift axis against each other meaning that they can be either perpendicular or parallel. For example, you might be doing a landscape photo where you are wanting to include more foreground and less sky, needing a downward shift of the lens. If you then also want to extend the plane of focus from a foreground object to the background, you would then tilt the lens forward, so in that case, you want both axes parallel.
In my case, there was a shot of a wall mosaic up at SFU where I wanted a downward shift of the photo as well as a sideways tilt of the lens to keep the entire mosaic, and the background, sharp. That required the tilt and shift axes to be perpendicular. There are two photos of the mosaic in the gallery, both at f/11 and one with the lens’ tilt centred, and one with it tilted towards the left to extend the plane of focus from foreground to background. Both images do have the lens slightly shifted downwards. The non-tilted one (open the large version in a new window here) allows you to get a feel what the shot would look like with a regular 30mm lens at f/11, and how limited the depth of field would be. Then for the next shot (also at f/11), I’ve tilted the lens towards the left (large version here) whilst carefully checking focus on the closest mosaic tiles as well as the background building in the distance, to ensure the entire mosaic wall and the background are tack sharp. This is the most fiddly part of shooting with a tilt-shift lens and it would help tremendously were one able to zoom in on two different parts of the image at the same time, in order to see the effects of varying degrees of tilt and tweaking of the focus point on those two different areas. Do note that this is a manual focus lens. In the end there was a lot zooming in and out of different points of the image while I adjusted the lens, but with careful tweaking, I was able to get critically sharp results along the entire wall, and of the background building as well, even when zoomed into 100% on a 100MP image.
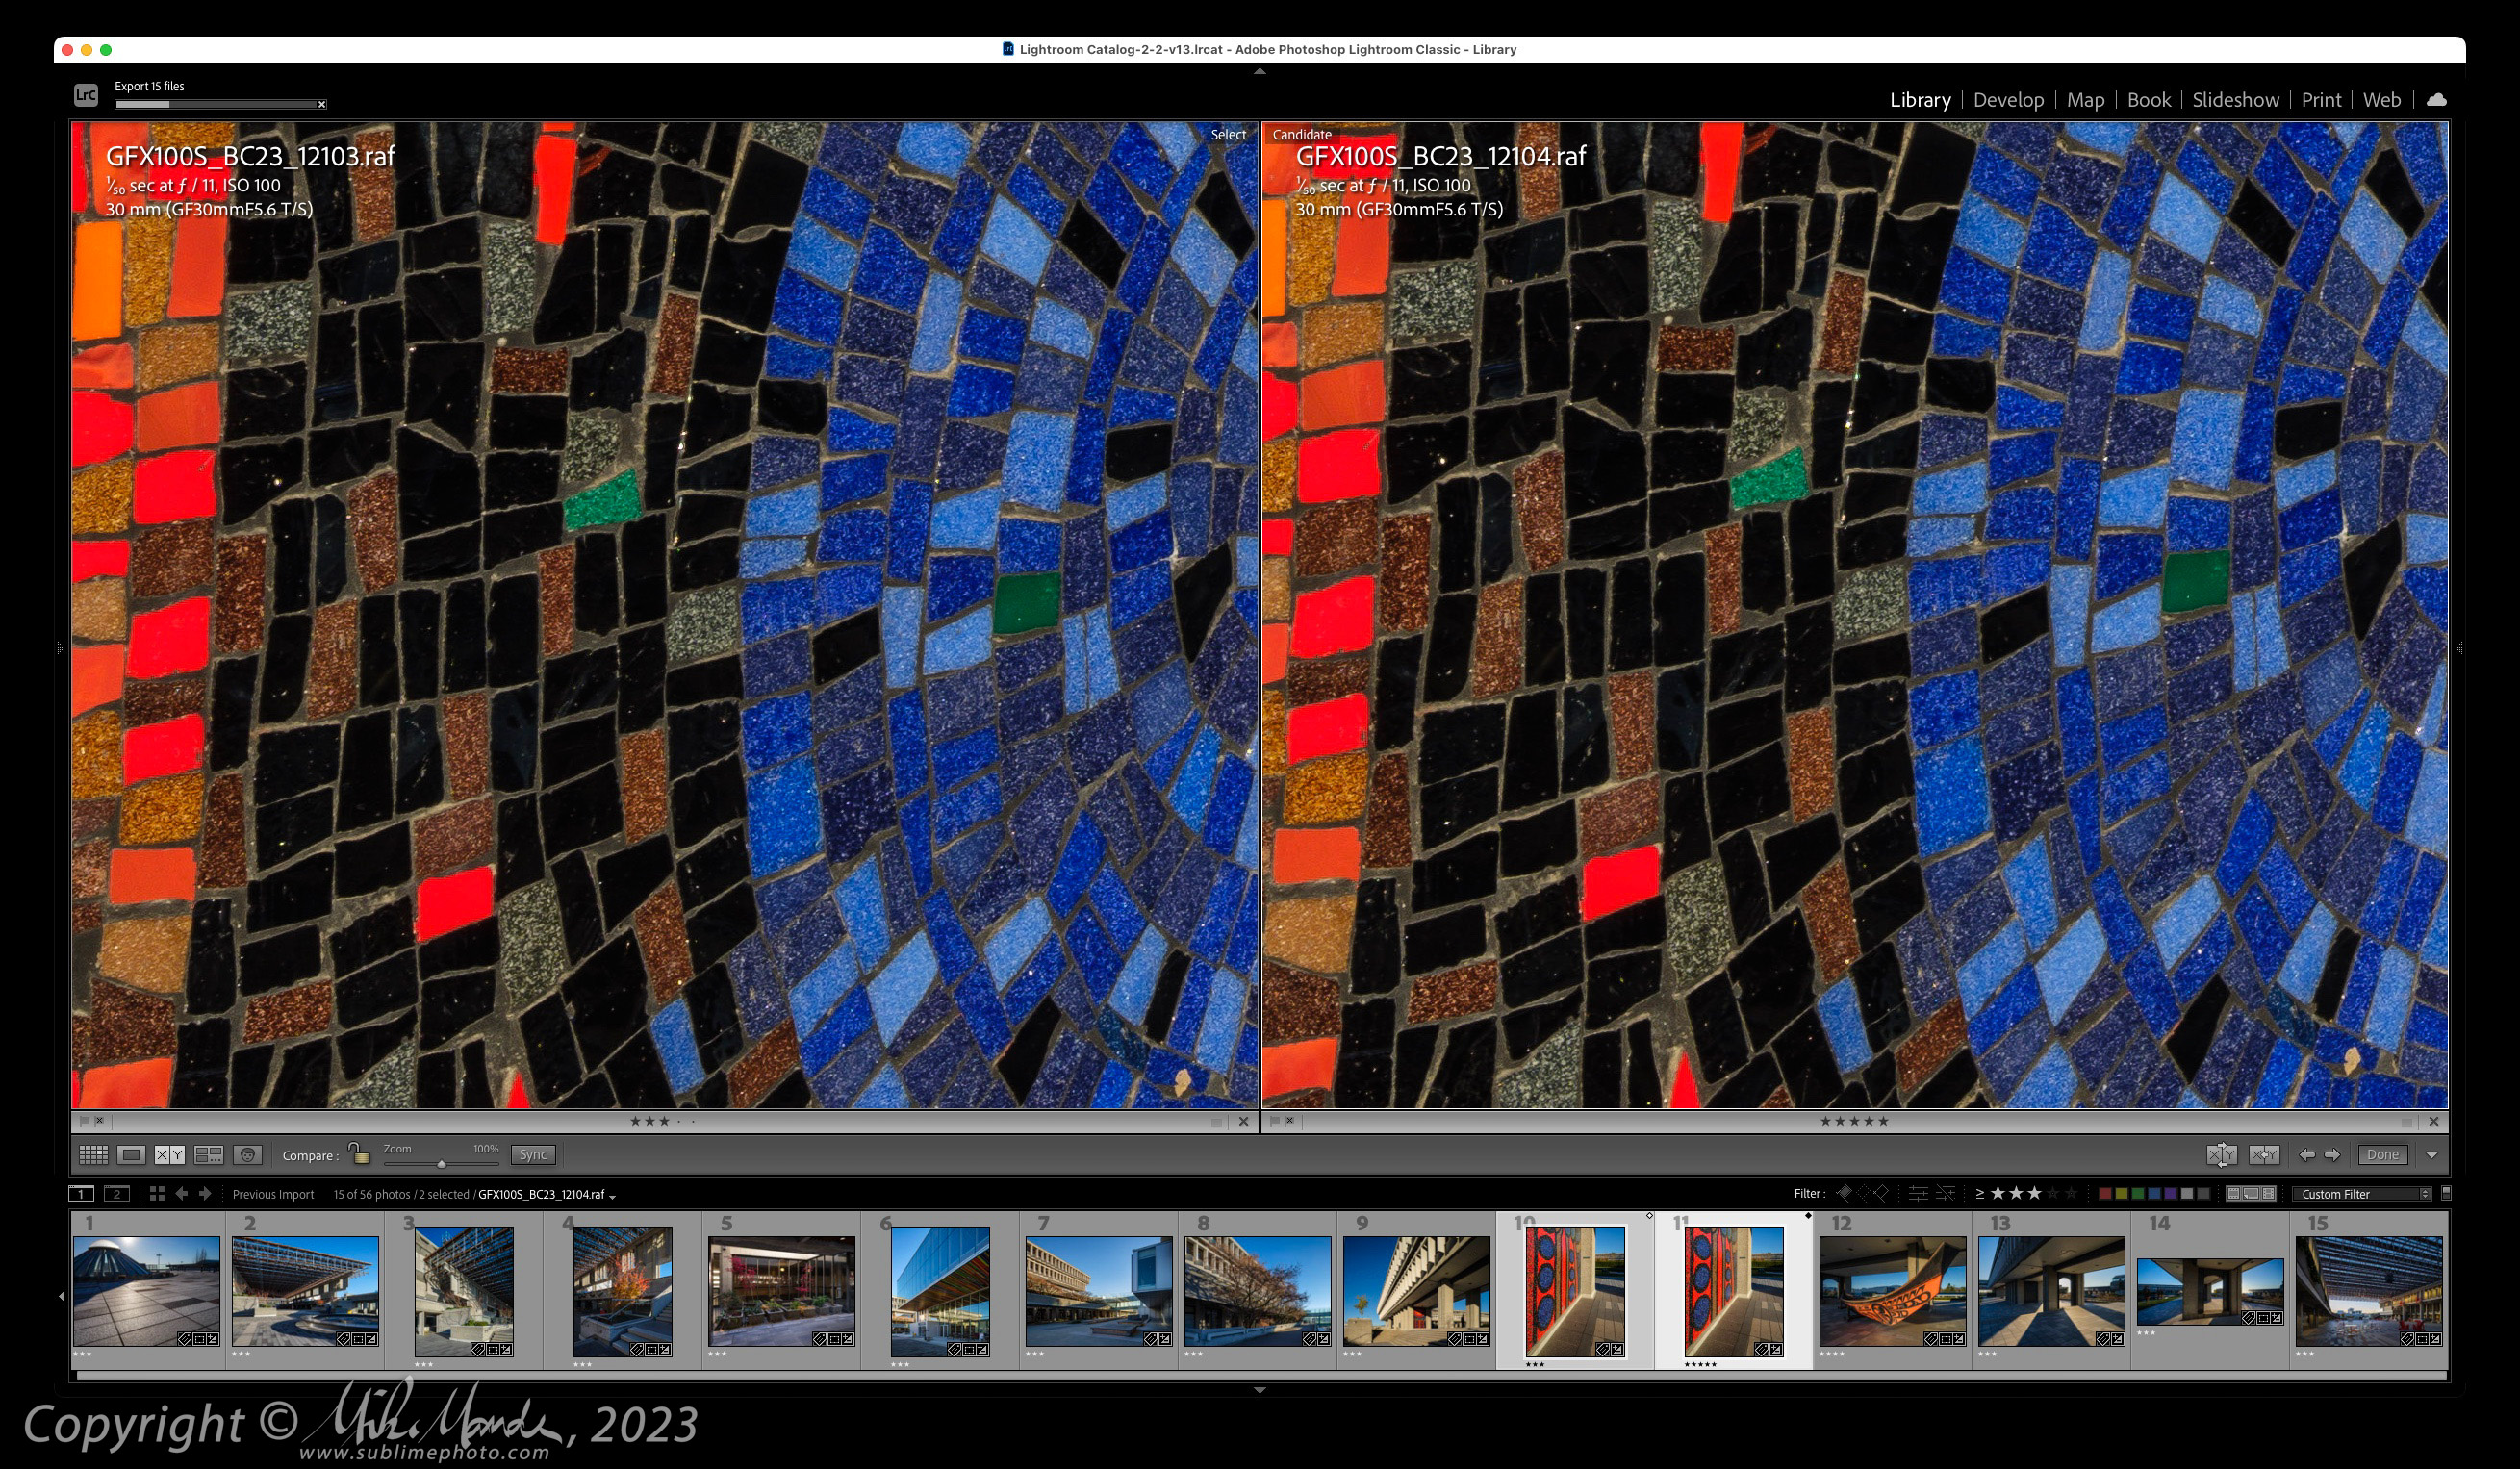
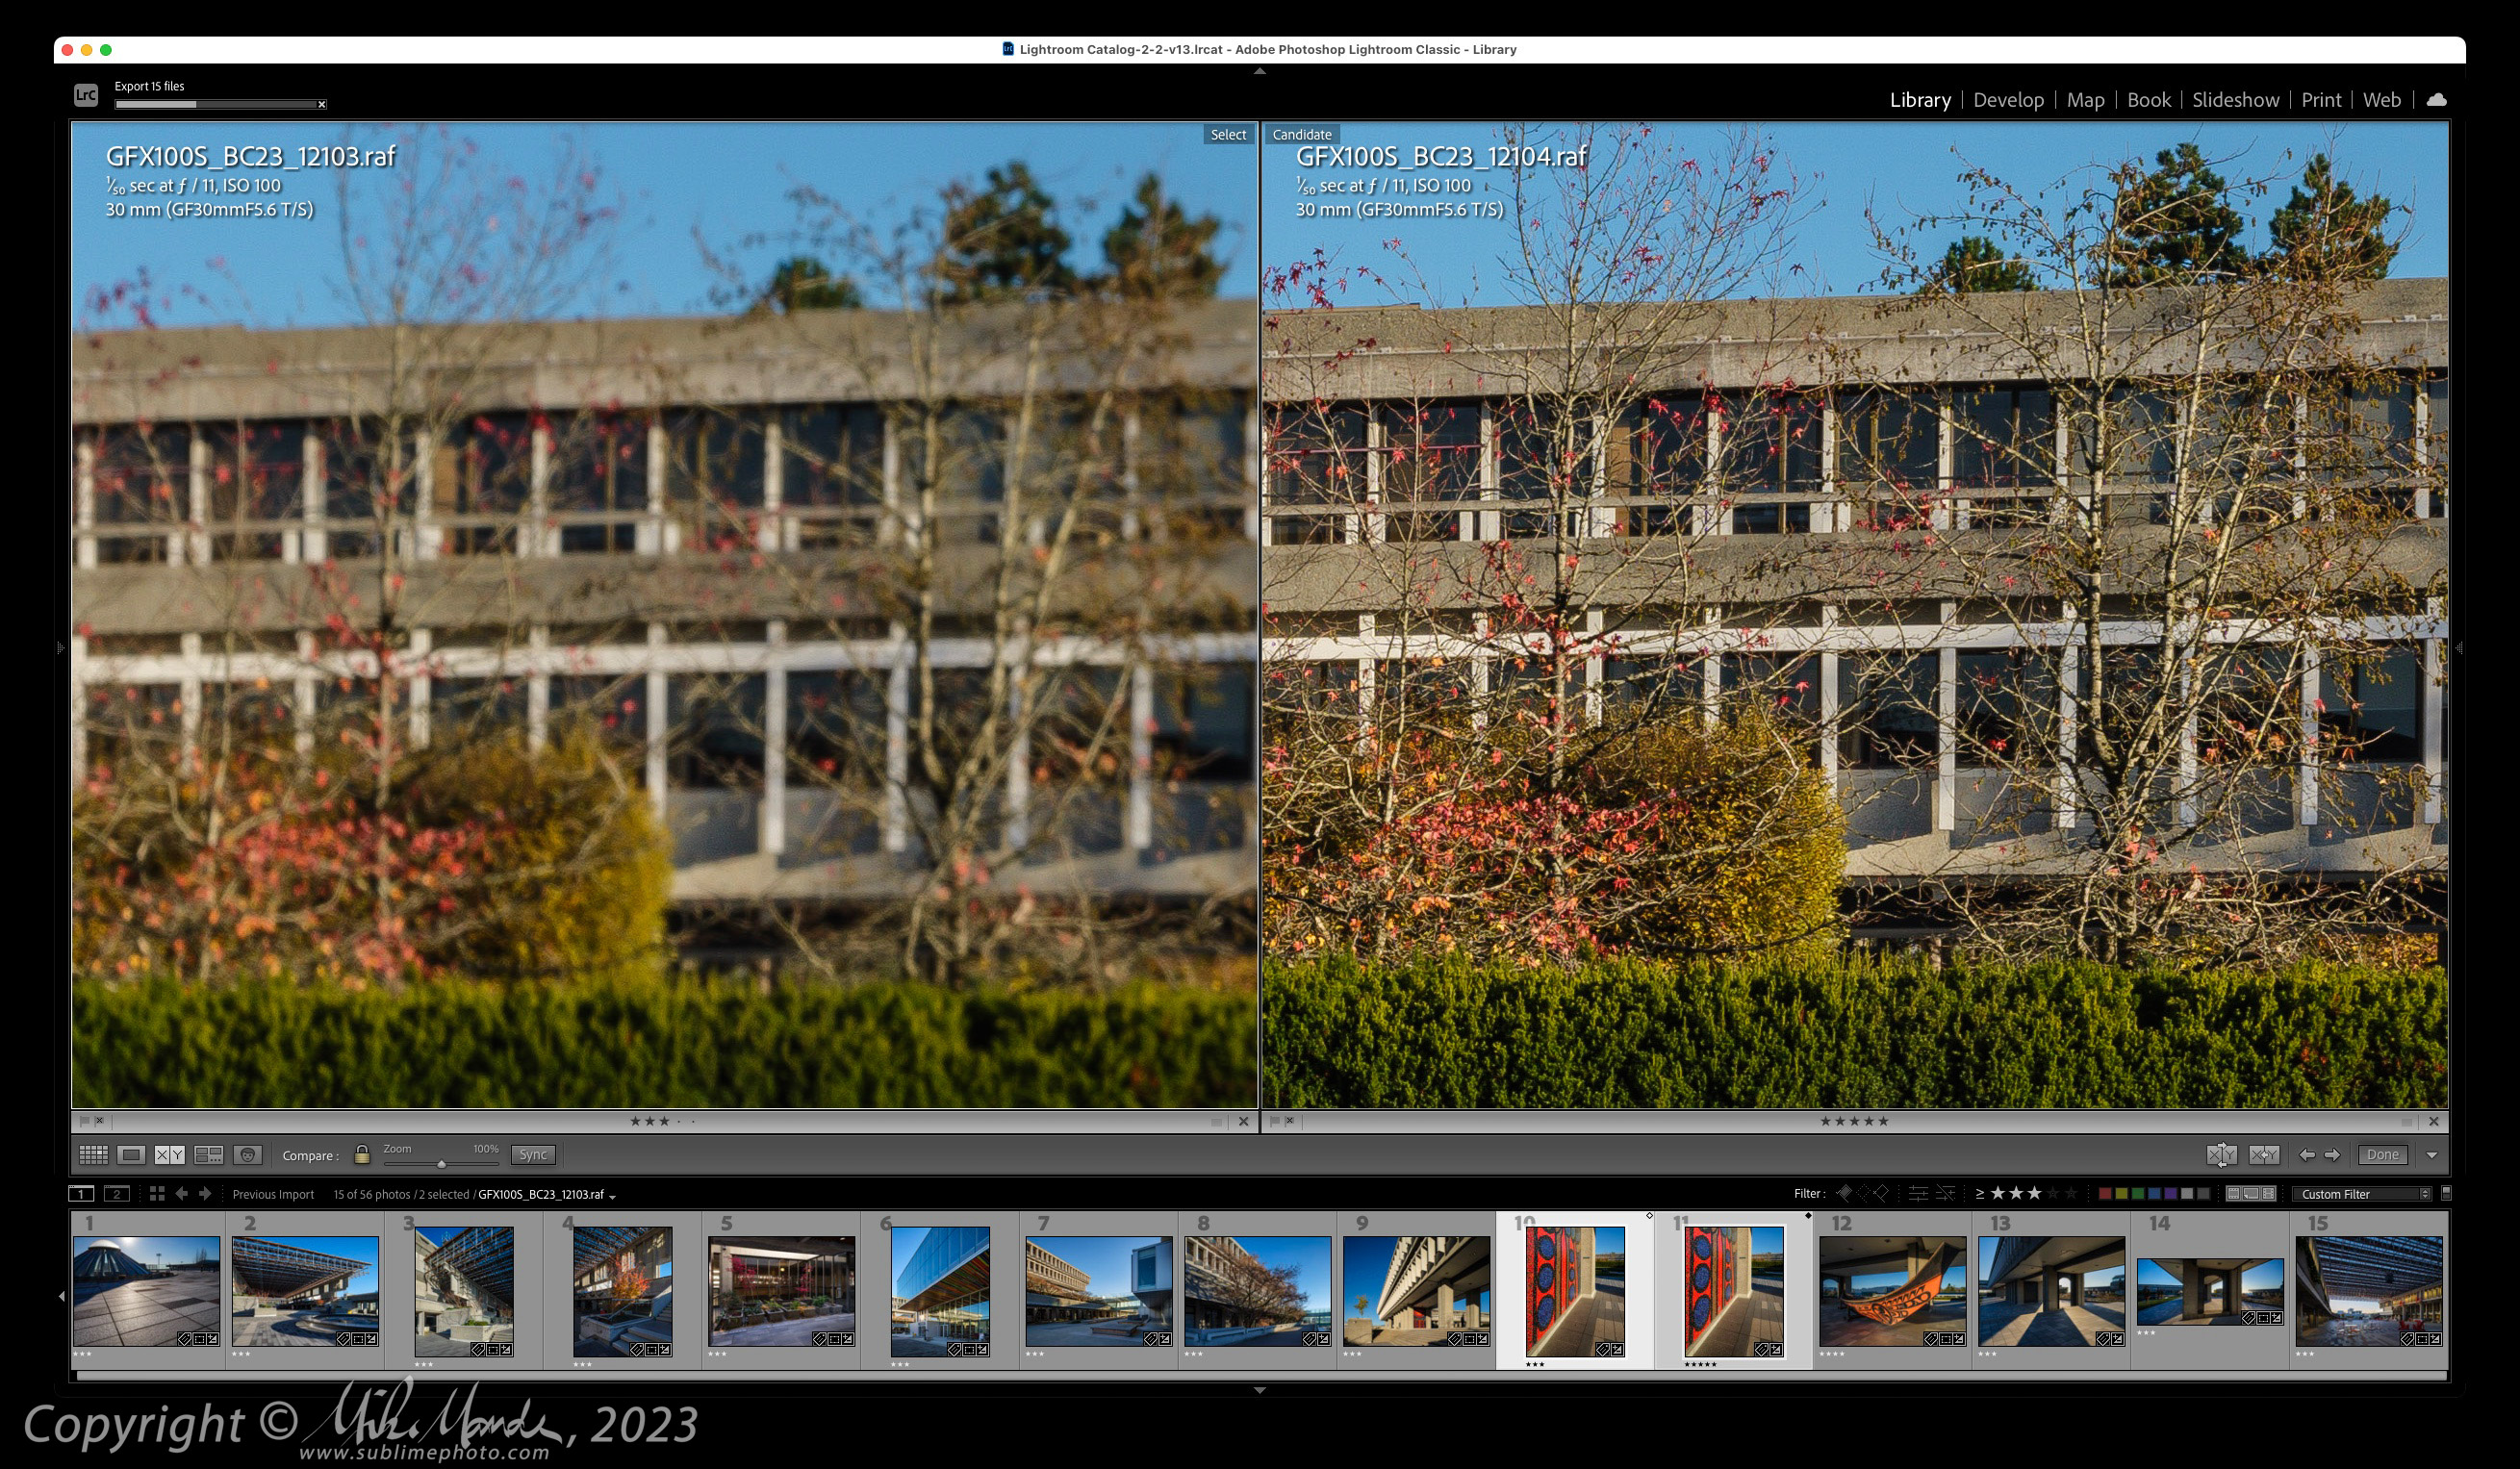
To see an actual comparison at the full 100MP of resolution, I have some Lightroom screenshots following, which can also be clicked on to enlarge in a new window. In all cases, the shot showing on the left of each comparison pair is the non-tilted one, and the one on the right has been tilted to extend the plane of focus. First, we have the near mosaic tiles where the actual point of focus is just a bit further to the right than the zoomed in crops show. Here both are equally sharp at f/11…
Then we have the image’s mid-point (roughly) showing the far end of the mosaic. here you can already see a lot of softness since the depth of field at f/11 is not enough to cover the entire mosaic…
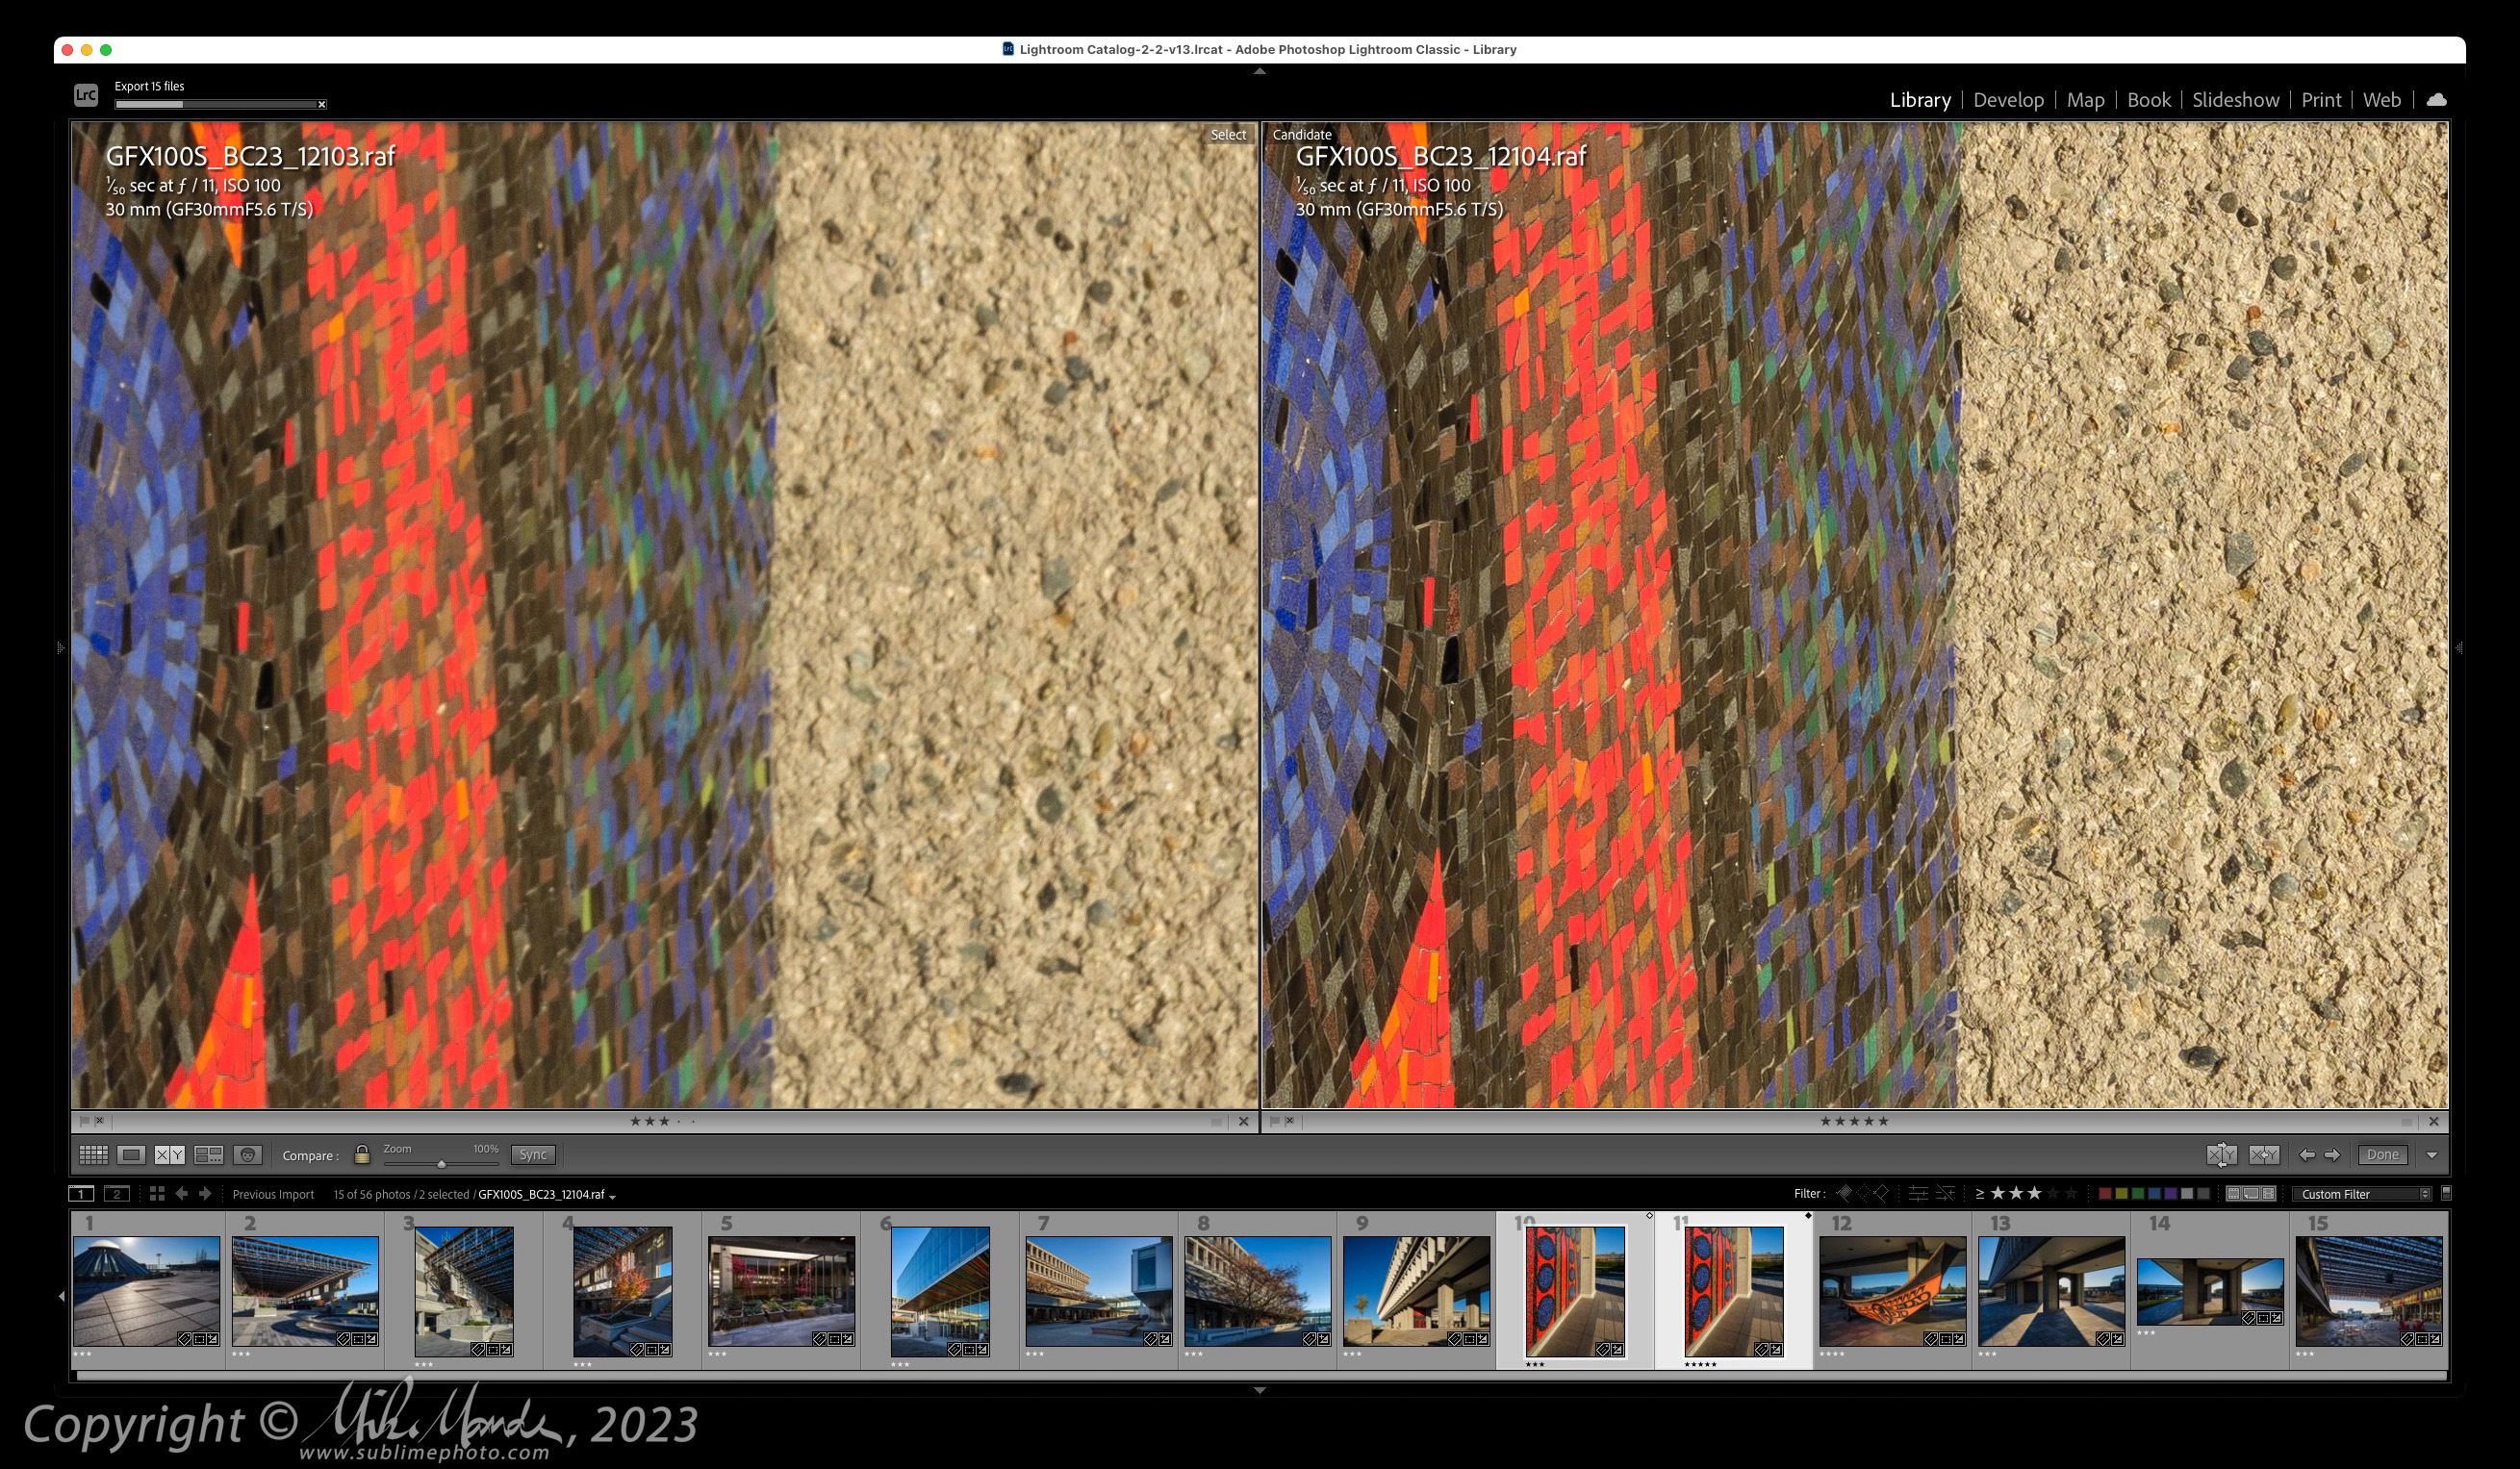
Finally, we have the building off in the distance, and here you can really see how incredibly effective the tilt is at extending the plane of focus! Remember to click on these screenshots to make sure you can see them at 100%, pixel-level zoom.
Of course, there is a limitation when you tilt a great deal, where sometimes other parts of the image might be less than ideally sharp – nothing comes for free! Here is the very bottom right of these shots…
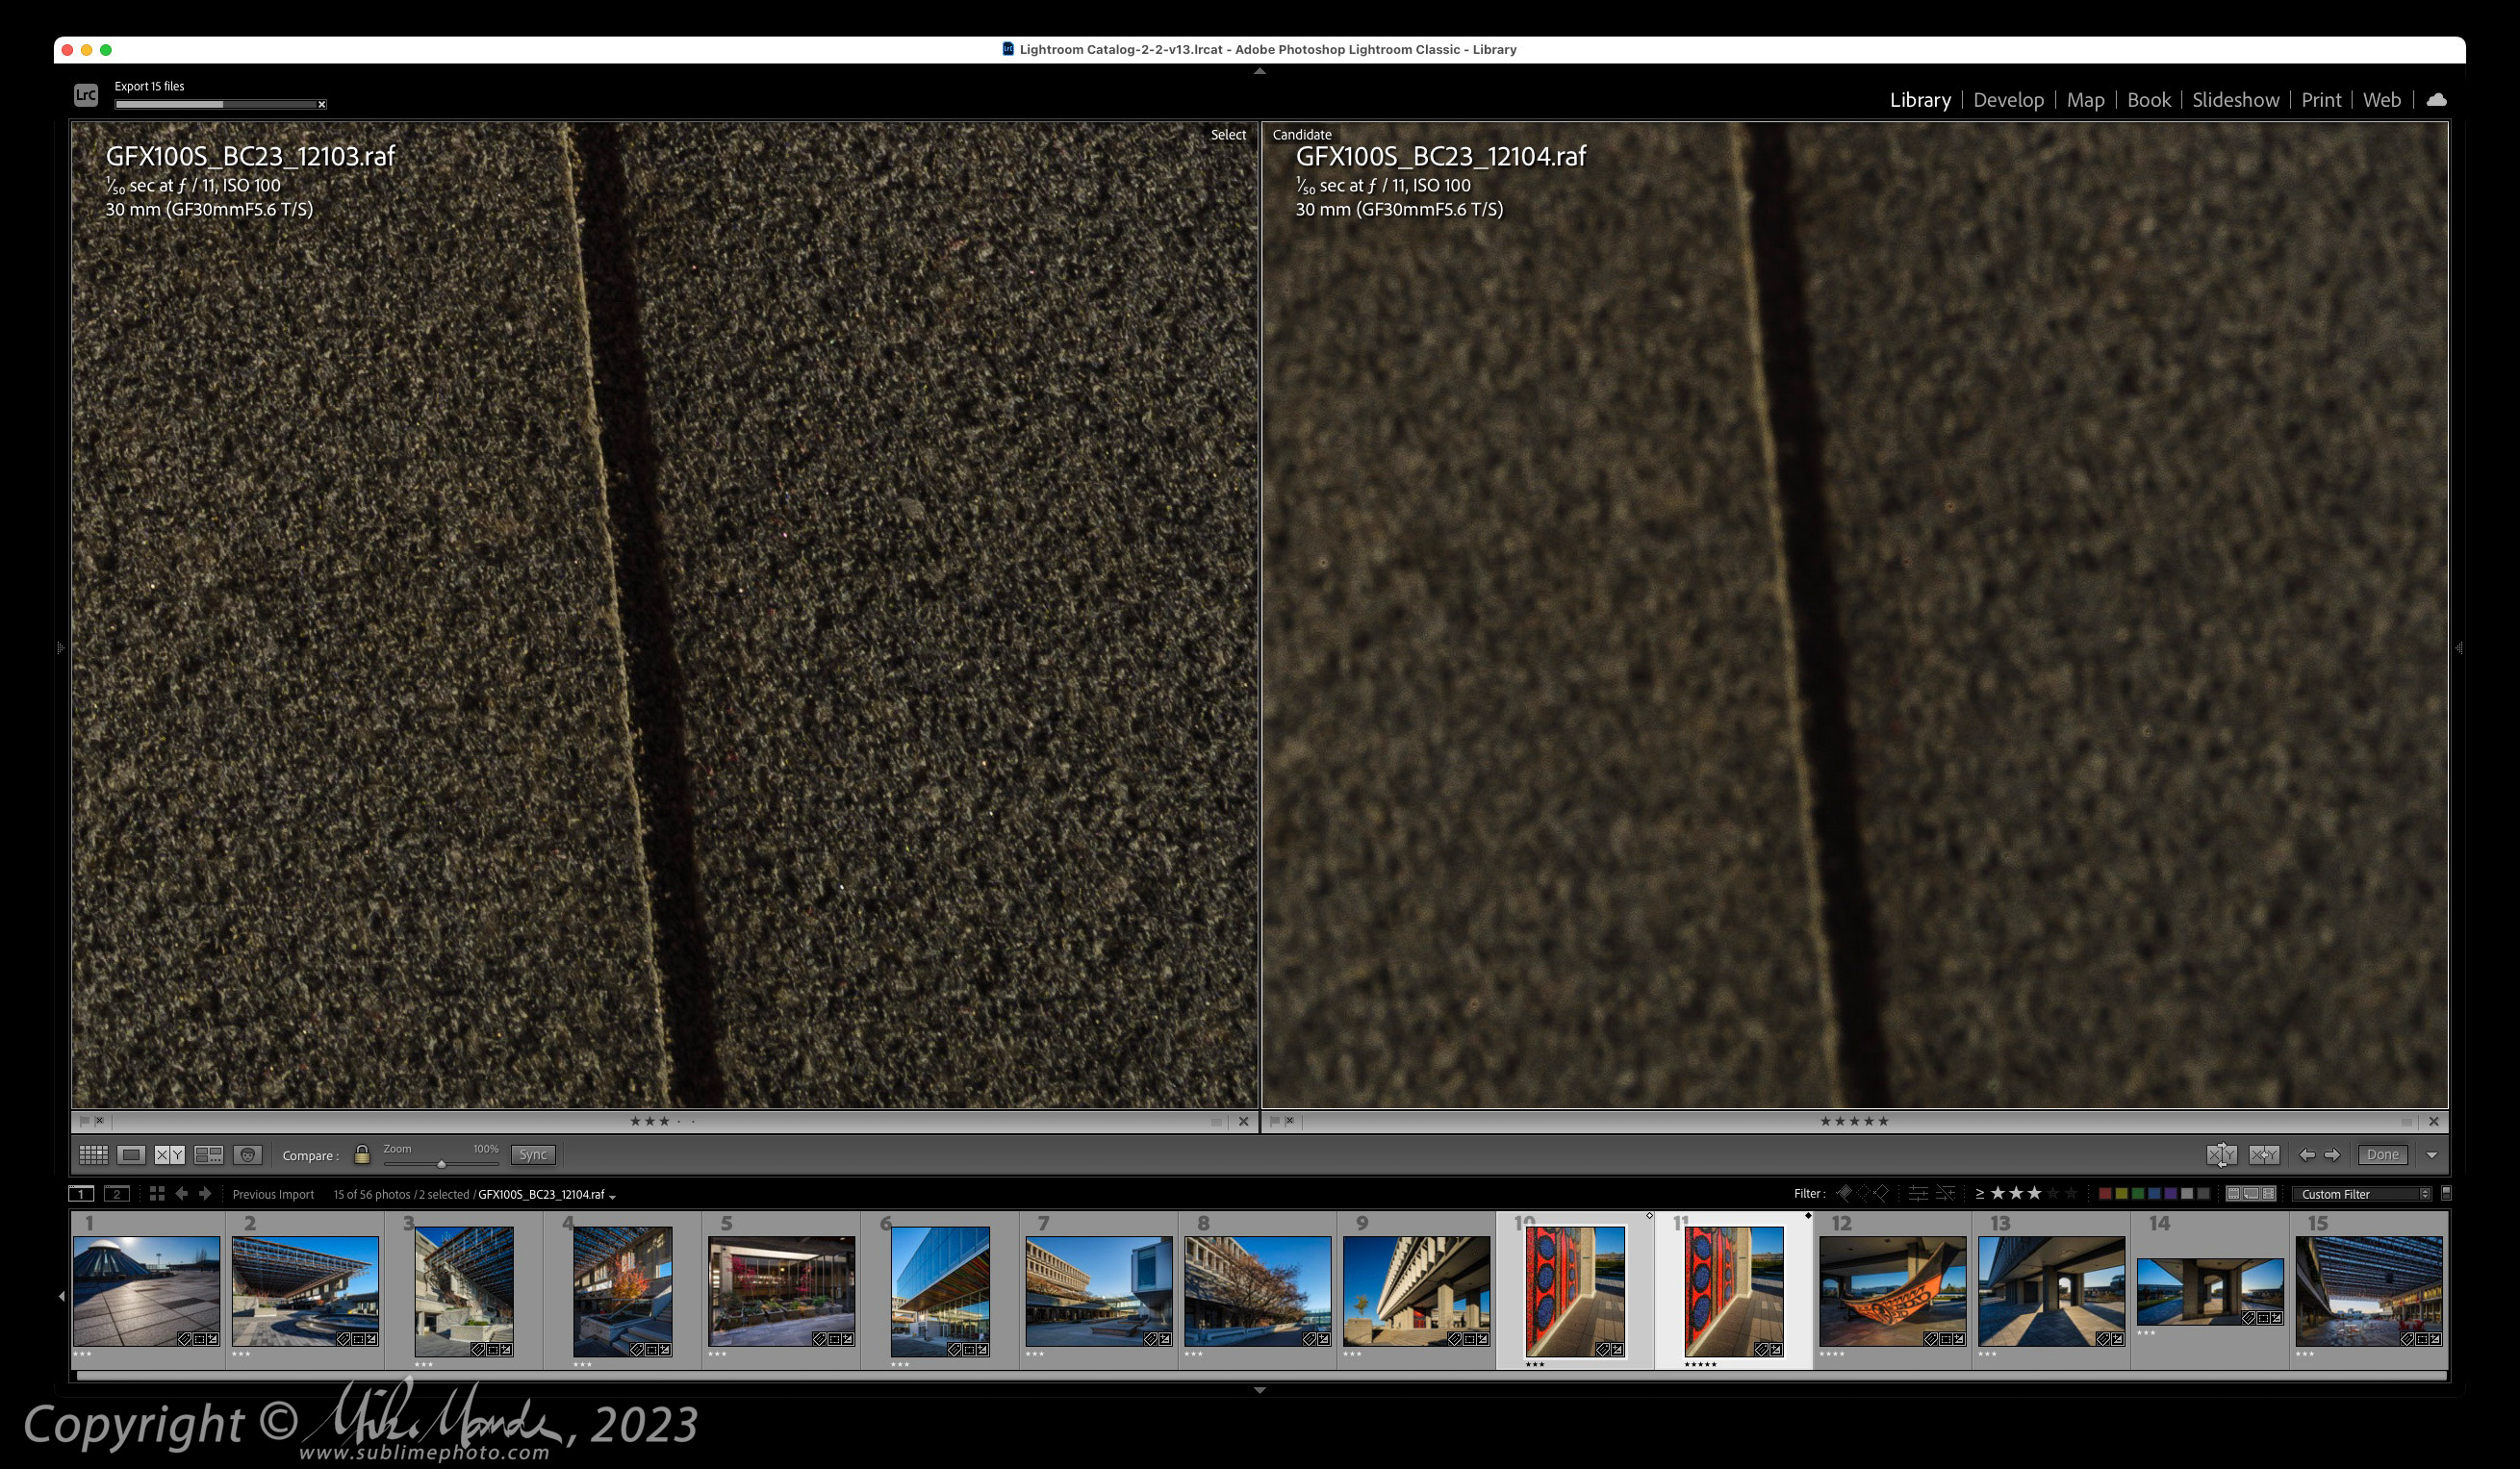
At the bottom right, the tilted shot is substantially less sharp! That said, in this case the goal was to achieve good sharpness along the wall and ideally extend that to the background, which I achieved, so the bottom right is not critical to my shot and softness there is a more than acceptable tradeoff. The only other shot in the gallery where I used tilt, was the one of the canoe, and the whole side of the canoe, from close to the camera to the back, should be quite sharp. Since it is a curved surface and not flat, it may have benefitted from a slightly smaller aperture. Many more shots had the lens shifted though, to maintain properly straight vertical lines in the buildings.
To see how much the lens was shifted for this shot in the gallery, see below…
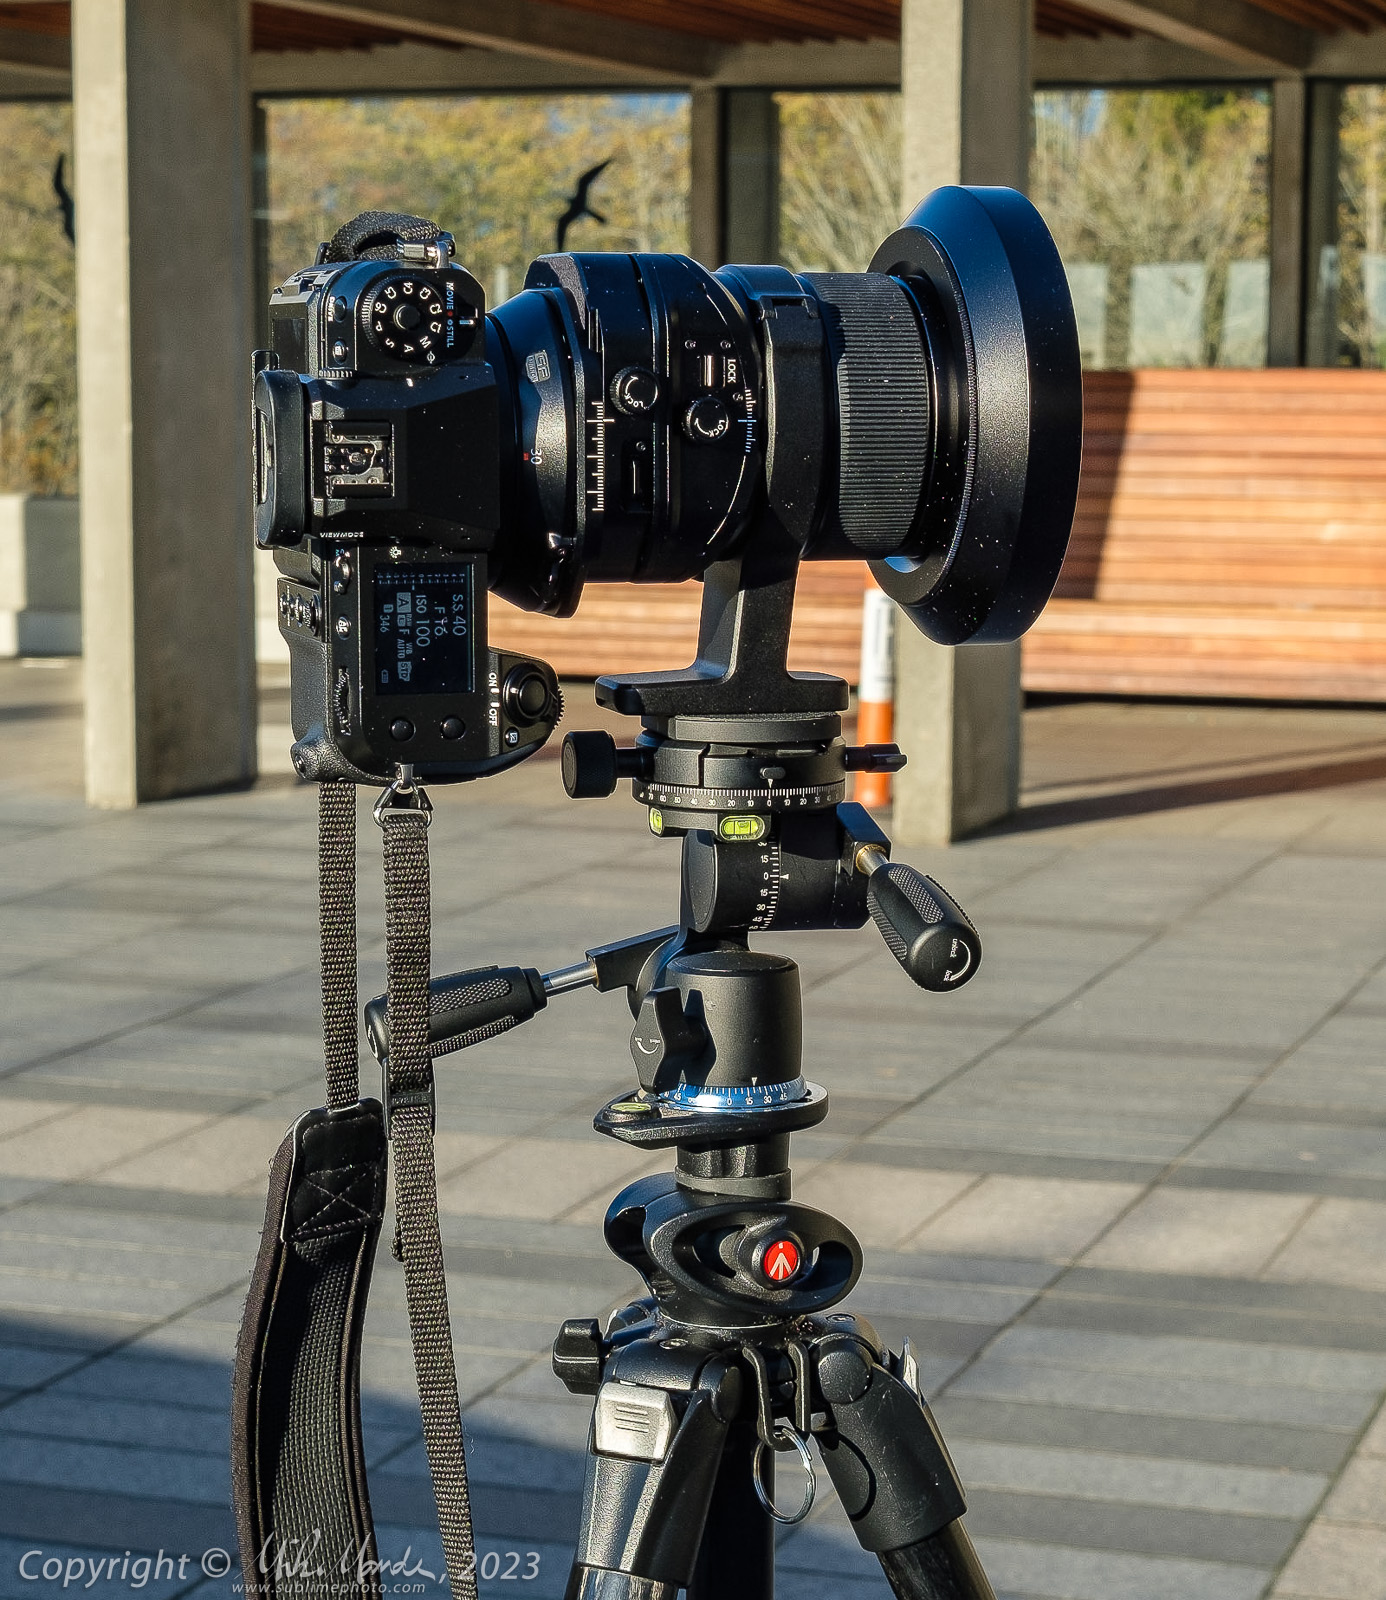
One thing you’ll notice is that the lens does come with a tripod mounting foot. Not only is this an advantage due to its size and weight, also making it easier to do a vertical, but since the tripod foot is actually attached to the front of the lens, that means you can stitch a panoramic by shifting the body on the lens, keeping the lens absolutely stationary with respect to the scene, and thus not needing to worry about any parallax issues with close foreground objects. Cool!
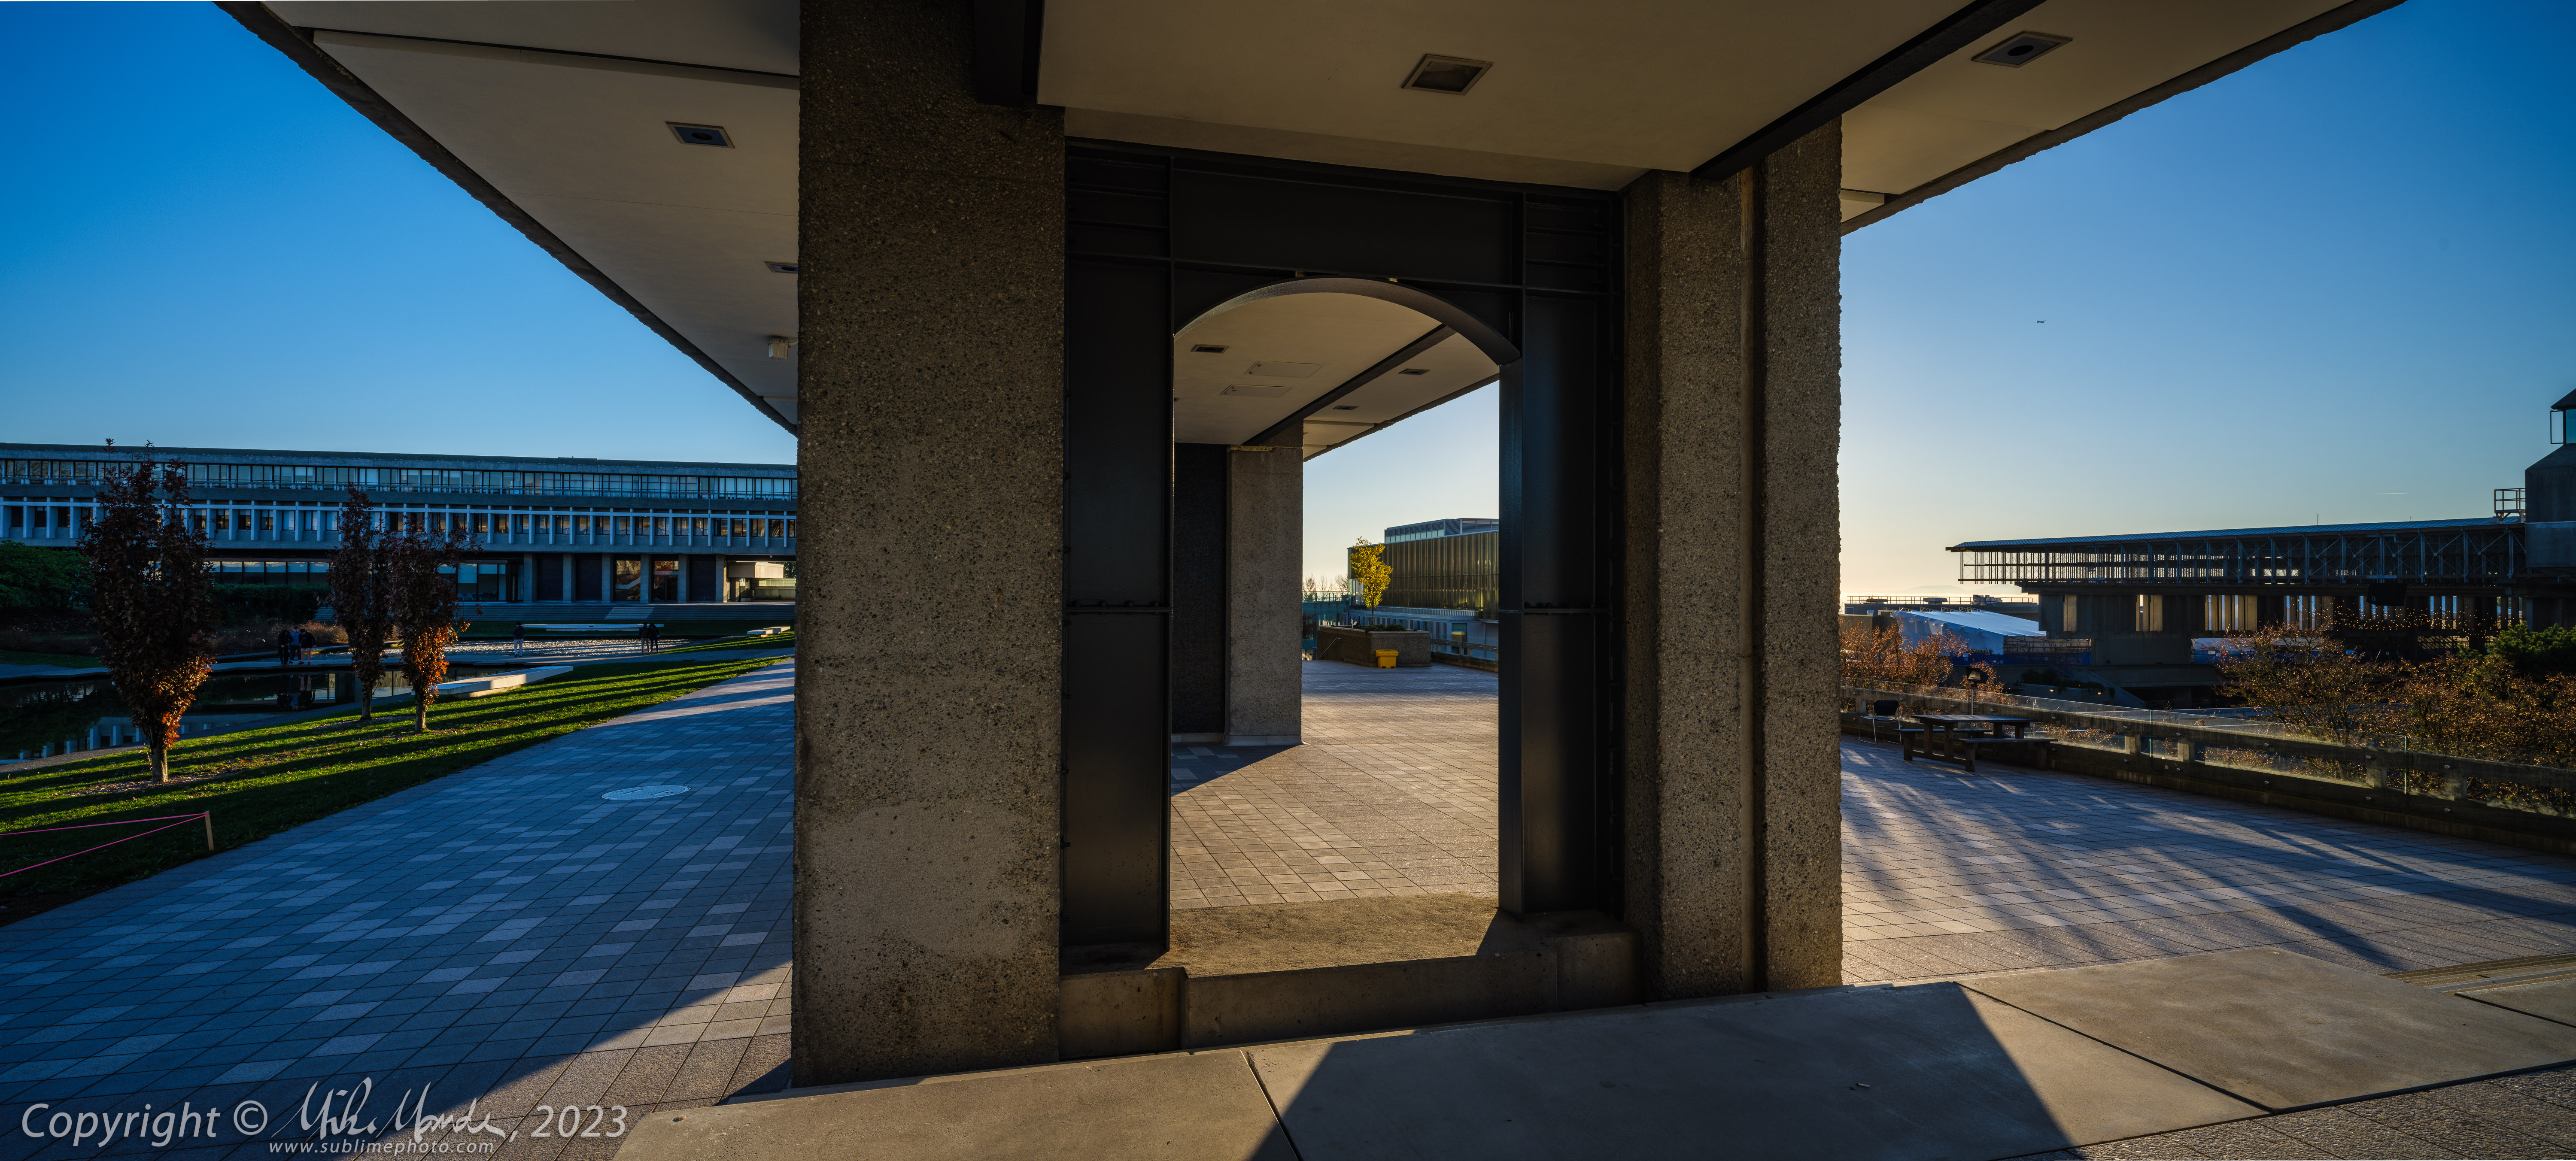
Following is a panoramic, a three shot horizontal stitch in the gallery. What I really should have done was a three shot stitch with a slightly different angle on that canoe I photographed for the gallery, so as to have some closer foreground to show how easy a stitch like that can be. Oh well, didn’t think of it at the time! In any case, one huge advantage of stitching is the relative lack of stretch distortion at the edges of the frame, where if an ultra-wide would have been used for a single, panoramic cropped shot, the stretching at the edges of the frame would have been much worse. If you look at the repeating windows on the building in the distance on the left side, you can see that there isn’t too much stretching with this focal length.
Lastly, the lens is extremely well corrected for distortion, with perhaps only a hint, the tiniest bit of barreling (about the only slightly negative thing I can really think to mention), and about the only other observation (and a good one this time) is that the lens seems to be extremely flare resistant. The very first shot in the gallery has the sun right at the top of the frame, and there is almost no loss of contrast and no internal reflection flare “blobs” that are visible, which is very impressive. So all in all, extremely impressive on all fronts! Honestly, what barrel distortion there might be is so slight, it was almost not worth mentioning.
At $5,400, this lens is certainly not inexpensive, but for demanding landscape or especially architectural photographers, this lens could really help with image quality and productivity, eliminating the image quality losses and time needed to correct perspective in post, and also to allow for extended depth of field in some scenarios without the need for image stacking, which can be a pain if there are things moving in your composition.
As mentioned earlier, we are still waiting for stock to arrive, but we do have one in our rental pool if you need one for the occasional shoot, or would like to try it out in anticipation of perhaps buying one for yourself. Just be warned: the lens is so impressive that after you try one for yourself… well you know…